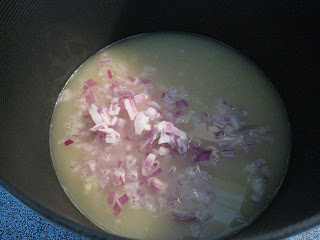
Wednesday, January 26, 2011

Shrimp Bog

So who knew that bog meant rice?  I always knew that a bog was related to cranberries.  Even more interesting was actually seeing a working bog to grow them in Wisconsin.  However, this recipe has nothing to do with cranberries and everything to do with shrimp.  The recipe came from the book Edible by Tracey Ryder and Carole Topalian.  They do explain that a bog is close to a pilau and that it probably got it's name because rice also grows in a bog...who knew?

What drew me in to cook this particular recipe was the shrimp and rice combination...well plus the picture!  I always like to know what I am supposed to be doing even if it isn't what I determine the recipe should be once I start reading it.  Anyway, the authors state this should take about 30 minutes to make which is due to the time it takes to cook rice, but in this case you get a whole meal.

Sullivan's Island Shrimp Bog
Make 6 servings

1 1/2 cups long-grain white rice
1/2 pound sliced bacon, finely chopped
2 medium onions, finely chopped
1 teaspoon kosher salt
3/4 teaspoon freshly grated nutmeg
1/4 teaspoon freshly ground cayenne powder
2 1/4 cups chicken broth
1 can (14.5 oz.) diced tomatoes
2 teaspoons freshly squeezed lemon juice
1 1/2 teaspoons Worcestershire sauce
2 pounds medium shrimp (40 count), shelled and deveined
1/4 cup ver finely chopped flat-leaf parsley leaves
1 lemon wedge, cut into 6 wedges

In a fine mesh strainer, rinse the rice well under cold running water.  Drain well; set aside.

In a large heavy Dutch oven or stockpot, cook the bacon over medium heat until golden, about 5 minutes.  Using a slotted spoon, transfer the bacon to a paper towel-lined dish; set aside.  Pour off and discard all but 3 tablespoons of the bacon fat remaining in the pot.  Add the onions to the pot and cook over medium heat, stirring occasionally, for about 3 minutes.  Add the drained rice, salt, nutmeg, black pepper and cayenne and stir for 1 minute.

Stir in broth, tomatoes with liquid, lemon juice and Worcestershire sauce.  Bring to a boil, cover the pot, reduce the heat, and simmer gently for about 20 minutes.  Stir in the cooked bacon and the shrimp and cook uncovered, stirring occasionally, until the shrimp is cooked through, adding more broth if the rice seems to be drying out, about 10 minutes.  Stir the bog with a fork.  Taste and adjust seasonings as needed.  Sprinkle with parsley, garnish with lemon wedges, and serve immediately.

Monday, January 24, 2011

Eggs - it's what for breakfast.

I have to say that after butter, I use more eggs than any other ingredient.  At least I can get fresh and delicious eggs in addition to the regular store bought ones.  If you have never eaten freshly laid eggs, then you are truly missing out on some wonderful tasting food.  Even the color of the eggs is better than regular store bought eggs.  I highly recommend to find someone who has chickens and invest in their product.

So yesterday morning after a day on the powder filled slopes I was craving some decent protein for breakfast.  I was also craving green things.  My boyfriend always gives me a hard time for describing things as tasting green, but I really think that is the best description for some green things (like spinach or kale).  However, this morning I opened up the refrigerator and pulled out the herbs I had been hiding away in there which included tarragon and chives.  I chopped up the red pepper I had leftover from something else while my boyfriend beat the eggs.  With the olive oil heating in the pan, we soon had everything ready for a pleasing looking and delicious breakfast.
Basically the recipe is (for 2 servings):

4 eggs, beaten with some milk (1/2 cup maybe)
Olive oil
1/2 red pepper, diced
Shredded cheese
Chives, chopped
Tarragon, Chopped
Salt and pepper to taste

Heat the pan with a few tablespoon of olive oil.  Once hot add the beaten eggs and then wait for a minute to cook.  Add the red pepper, chives and tarragon.  Add salt and pepper.  Turn the eggs so they cook throughout (though not quite completely or they will loose their creamy texture).  Just before cooking throughout add the shredded cheese.  Serve and consume immediately.

Sunday, January 23, 2011

Summer Spaghetti

I like pasta as much as the next person.  In fact my boyfriend loves the stuff and eats it all the time.  So when he looked through another Canal House cookbook, he spotted in volume 1, Stephan's Summer Spaghetti.  I thought, cool, this will be a quick easy meal.  I never thought that a simple pasta meal could be so infused with flavor that I am tempted to make it every week!  It definitely has inspired me to pull out my tomato and basil seeds to ensure that I have plenty of ingredients to make this pasta again and again when everything is blooming and growing.  Ever since I tasted this pasta I have been dreaming of eating it again.

This is a quick recipe, so I suggest that you complete all your chopping before you start the pasta boiling.
Stephan's Summer Spaghetti

1 pound spaghetti
Salt
1/2 cup olive oil
4 cloves garlic
Great big bunch of basil, leaves chopped
6 tomatoes, halved, cored, squeezed of seed and juice, chopped
Pepper
1 cup freshly grated parmigiano-reggiano

Cook the spaghetti in a large pot of boiling salted water over high heat.  Meanwhile, heat the olive oil in a large skillet over medium heat.  Add the garlic and cook until it softens and turn a little golden.  Remove the garlic and discard.  Add all the basil, then the tomatoes, and stir around until just heated through.  Season to taste with salt and pepper.

When the pasta is about three-quarters cooked, drain out most of the water, leaving about 1/2 cup pasta cooking water in the pot.  Return the pot with the spaghetti to the heat.  Pour in all the tomatoes, oil, and basil lusciousness from the skillet and let it finish cooking for about 5 minutes.  Stir in the grated cheese.  Serve with a little more olive oil and more cheese.  (Note: I did not use an entire cup of the cheese as I wanted a more subtle flavor.  I did add a little more to the top before eating, but I wanted to be sure all the flavors would come through before adding more cheese.)

Monday, January 17, 2011

Light lunch in winter - Swordfish with lemon butter sauce

Canal House Cooking has amazing recipes and great cookbooks.  I highly recommend their cookbooks to anyone who likes to cook.  Many of the recipes are things they say they eat with their families, which to me means that they are fairly easy and not very time-consuming to prepare.  I altered this recipe as they serve the sauce over salmon, but when we went to buy fish the swordfish drew us in and that became the fish of choice for us.

Keep in mind too that Canal House's cookbooks are based on seasonal fare and this particular cookbook (volume number 4) came out last summer.  I was looking for something lighter for lunch, but we were also lucky as the asparagus was looking really good this week and worked very well with the lemon-butter sauce.


Swordfish with Lemon-Butter Sauce

For the Lemon-Butter Sauce:
2 large egg yolks
8 Tablespoons (1 stick) cold Irish butter, cut into 8 pieces
1 Tablespoon lemon juice
Salt

For the fish:
Salt
1 1/2 pounds swordfish (or whatever kind you want), cut into four pieces
Fresh tarragon leaves, chopped
Fresh chives, minced

Whisk together the egg yolks and 1 tablespoon water in a medium saucepan.  Cook over low heat, whisking continuously so the yolk won't scramble.  Add the butter one tablespoon at a time before adding the next one.  If the sauce separates, remove it from heat and add the next tablespoon of butter and it should come back together.  Once all the butter has been incorporated, remove from heat and whisk in the lemon juice.  Season with salt.  Keep the sauce warm by setting the pan in a larger pan of hot water.

Fill another pan with salted water, add the fish and simmer over medium heat until the fish is just cooked, about 20 minutes (depending on the fish).  Transfer to individual plates.  Spoon the lemon butter sauce over the fish and serve garnished with tarragon and chives.

Serves 4

Sunday, January 16, 2011

What is in a pound cake?

Old-Fashioned Pound Cake (from Starbucks)

This is a recipe which I stumbled across in a random (by random I mean free) cookbook from Costco.  As I was looking through the cookbook, I realized they were all based around ingredients from Costco.  At any rate, the few things I have tried at Starbucks have been great tasting, so I modified this recipe to fit what I wanted from the pound cake.

Since I live at high altitude I have had to make a few changes to get things to rise the way they should.  I can humbly say that the changes I made to this recipe (some are noted in the recipe) worked very well and the cake rose as I had hoped!  But it also didn't fall!

So what makes a pound cake a pound cake?  Just have a look at the ingredients in the recipe.  There is a whole pound of butter in this cake!  As it is baking, the sweet smells will fill your house with goodness!

Recipe:
4 cups flour
1 1/2 teaspoons baking powder (though I used more like 1 1/4 teaspoons due to altitude)
1 teaspoon salt
1 teaspoon cinnamon
(I added a dash of nutmeg)
1/2 teaspoon almond extract
2 cups (4 sticks) butter, softened
2 1/2 cups sugar
7 large eggs (due to altitude I used 8)
1/4 cup orange juice
1/2 cup water

Preheat oven to 350F.  Grease a 10 inch tube pan or a 12 cup fluted tube pan.  In a bowl, mix flour, baking powder, salt and cinnamon until well blended; set aside.   Beat butter and granulated sugar in a large bowl with an electric mixer on medium speed until light and fluffy.  Add eggs one at a time, beating well after each addition.  Also add the almond extract.  Add the flour mixture mixture alternatively with the coffee, beating until well blended after each addition.  Pour into prepared pan.  Bake for 90 minutes (though mine ended up at about 82 minutes), or until a toothpick inserted near center comes out clean.  Let cool for 10 minutes.  Loose the cake from the sides and gently remove from the pan.  Let cool completely on a wire rack.  Sprinkle with powdered sugar.  Makes 20 servings.

Sunday, January 9, 2011

Mago Tuna and Daikon Hot Pot


Today’s lunch was perfect for cold weather – Mago Tuna and Daikon Hot Pot.  Hot pot cooking basically poaches the food in a broth for a one pot cooking experience.  The recipe comes from the book Japanese Hot Pots by Tadashi Ono & Harris Salat.  I bought this particular book because I love soups when it is cold out and my boyfriend loves Japanese food.  This combines both of our interests into one and makes it easy to enjoy Japanese food at home.

The one glitch in this book is that sometimes Asian ingredients may be difficult to find.  However, there is a wonderful Asian market in my town which carries food from the Pacific region.  With the help of a woman who tracked down a number of ingredients for us in the store, we were well on own way to having everything we needed for this recipe and not some of the more simple recipes I am planning on cooking!
 
Yellowtail and Daikon Hot Pot
by Buri Daikon Nabe
Serves 4 (though I cut the recipe in half and we have plenty leftover)
1 pound daikon, peeled, halved length-wise and cut into ½ inch thick slices
2 cups dashi
2 cups water
2/3 cup mirin (found near or with the vinegars)
2/3 soy sauce (a strong one is preferable)
½ pound napa cabbage, sliced
½ package (about ½ pound) firm tofu (I like the extra firm better than firm), cut into 8 slices
1 negi, sliced on an angle into 2 inch pieces (I could not find them so substituted scallions)
4 ounces shiitake mushrooms (about 8 pieces), stemmed and caps halved
1 pound yellowtail fillet, cut into 1 inch thick slices
2 cups shungiku leaves, stemmed (they are related to chrysanthemums)
Sancho for accent (though I used Thai chilies and they are really spicy)


Add the daikon to a small saucepan and cover with water.  Bring to a boil over high heat.  Decrease the heat to medium and cook the daikon until it’s tender, about 15 minutes.  (The book says it is done when a chopstick is inserting and comes out easily.)  Transfer the daikon to a colander and cool under running water; reserve.
Prepare the broth by combining the dashi, water, mirin and soy sauce in a bowl; set aside.


Prepare the rest of the ingredients.

Please the cabbage on the bottom of the hot pot.  
Add the tofu, daikon, negi, and shiitake mushrooms on top of the cabbage, arranging each ingredient in a separate, neat bunch.  Pour in the reserved broth.
Cover the hot pot and bring it to a boil over high heat.  Uncover the pot and place the yellowtail on top of the other ingredients.  When the broth returns to a boil, decrease the heat to medium.  Simmer until the fish is cooked through, about 15 minutes.   
Add the shungiku leaves and cook for 2 minutes more.
Transfer the hot pot to the dining table.  Serve the ingredients together with the broth in small bowls, accenting with the sansho.
Suggested shime: udon

Southwestern Vegetable Paella

This weekend I collected all the cookbooks that I wanted to cook out of and compiled a list of ingredients for about five meals.  As I began this process I was excited to be getting the variety I want in my meals and cooking as well as getting my boyfriend involved so he too will enjoy my cooking experience.

First up is a cookbook called Southwestern Vegetarian by Stephan Pyles.  It is an out of print book, but you can find it in used bookstores or online used books.  I really like vegetarian books because they get me to cook with more vegetables than I otherwise would, and I always find that meat is easy to add to these meals to satisfy my boyfriend's desire for meat in each meal.  This way we are both happy as he gets his meat and I get more variety of vegetables.

This is a fairly simple recipe to execute as long as you have done all your chopping ahead of time.  Then, once you begin cooking, you can add everything as you need and ease into a relaxing meal.  The following list is my twist on the paella as I added spicy sausage and changed out a few of the ingredients as they were not available.

Southwestern Vegetable Paella
2 Tablespoons olive oil
1/2 onion, diced
4 garlic cloves, minced
1 teaspoon paprika
1 cup freshly shelled peas
1/2 cup green beans, cut into 1/2 inch lengths  (I used frozen.)
1/2 cup corn kernals
1/2 cup diced carrots
1/2 red bell pepper, seeded and diced
1 poblano chile, seeded and diced (I used 3 different chilies as no poblanos were available)
4-6 large cherry tomatoes, diced
1 teaspoon Chipotle Chile tabasco sauce
1 pound spicy Italian sausage

1 cups white rice
12 saffron threads, minced
6 cups boiling chicken stock
6-8 artichokes (I used ones from a jar.)

In a saute pan, cook the sausage until no longer pink, drain.  Then in a large saute pan, heat the olive oil over high heat.  Add the onion and saute until the onion starts to brown.  Add the garlic and saute for another minute.  Add the paprika, peas, beans, corn, carrots, bell pepper, chile, tomatoes and artichokes.  Cook until the vegetables start to soften and release their juices.  Add the cooked sausage, chipotle sauce, rice and saffron.  Stir to combine.  Bring the stock to a boil and add to the pan.  Bring to a boil again and reduce the heat to a simmer.


Cover and simmer for 20 minutes.  Once rice is nearly cooked, season with salt and/or pepper (though I didn't use either in this recipe).  Cook a further 5 minutes or until the rice is tender, but not mushy.  Serve garnished with parsley and lemon, if desired.
This recipe with develop more flavor as it rest overnight.  It is also very good reheated.  Although it looks like a lot of ingredients, each one adds color and flavor to the dish to make the end result complex in flavors and appetizing.  I would also encourage the use of more vegetables as with the two cups of rice, I felt like I could have had even more than were there.

Next up:  Yellowtail Hot Pot

Sunday, January 2, 2011

Souper soup

I don't know if I have mentioned this before, but I love soup. It can be regular old chicken soup with vegetables or even a good brand of canned soup like Amy's. I have found some very good quality soup in cans. Soup to me does not mean Campbell's...I always found it too salty and thin. I like a good thick soup which will fill your with a variety of flavors and tastes all in one bowl.
It's a New Year and although not that cold out, I thought it would be a good day to start the new year off with soup. This soup is one I make fairly often. I basically look into the refrigerator and the cupboard and see what I can throw together to make into a particular lovely tasting soup.
 I had some homemade turkey stock that I had made after Thanksgiving which I had been slowly using up.  I thought this would be the perfect base for a full flavored broth.  I added some onions which were leftover from our delicious omelets my boyfriend made for breakfast.  Once this was a rolling bowl, I added a few potatoes, black beans, diced tomatoes (though I can't remember if they had spice or chilies in them or not), corn and whatever spices I thought would add a good flavor.  This time I choose some fresh basil, espazote, chili powder, cumin, oregano, garlic, salt and pepper.  I can't remember if I added anything else!
Of course!  I also had leftover turkey that I added as well to persuade my boyfriend to try it as he is sometimes adverse to too many things without meat.  :)  After simmering for about 30-40 minutes the flavors had melded well and it was ready for eating.  Enjoy!

My New Year's Resolution is not to buy more cookbooks without at least cooking one thing from each one.  At least then I will be able to experiment more and continue to add variety to our meals.