Showing posts with label buttermilk. Show all posts

Wednesday, December 31, 2014

Aebleskivers (round Danish pancakes)

I have a serious love of breakfast.  I like savory eggs and bacon, egg in a hole, savory french toast.  But I love a good sweet breakfast too.  Just a slightly sweetened pancake batter with blueberries, pancakes with quinoa, waffles that I can tear apart with my hands to dip into real maple syrup.  The list goes on...so being that it is one of my favorite meals, I have a lot of specialized equipment which I don't use too much for regular cooking.  I have a Belgium liege waffle iron, a regular waffle iron, a juicer so I can have fresh squeezed orange juice with all the delicious things I make.  So this year, with my Scandinavian brunch in mind, I purchased a Danish Aebleskiver pan.  To great thing about these are that they are small and bit sized, but have many variations as you can stuff them with a teaspoon of jam or make them savory with cheese and scallions.  Here is the basic recipe which came from Nordicware's Breakfast cookbook which is sent with the pan.  I haven't have much time to try many variations, but I dream about the different ways they can be made and I long to crave another sweet day to knock out more....I think peanut butter and chocolate chips may be high on the list.
Danish Aebelskivers
Makes 21-35 aebelskivers

3 large eggs, separated
1 1/2 tablespoons vanilla sugar
1/2 teaspoon salt
2 cups flour
1 teaspoon baking powder
1 teaspoon baking soda
2 cups buttermilk

Butter for greasing the pan


Beat egg yolks with sugar and salt.  In another medium bowl whisk the flour, baking powder and baking soda.  Add the dry ingredients to the egg yolk mixture, alternating with the buttermilk.  In a small bowl, beat the egg whites until stiff peaks form.  Fold the egg whites into the batter gently.  Heat the aebleskiver pan over medium heat.  Brush a little butter into each well and add about a tablespoon (or until about 2/3 full).  Cook for about 3-4 minutes.  Turn with a chopstick and cook for another 2-3 minutes.  Remove when browned on both sides.  Place in a dish in a low heat oven to remain warm until serving.  Serve with jam, syrup or your favorite topping.


Monday, February 27, 2012

Rhubarb Muffins

Since I started growing my own rhubarb, I have collected many recipes to try out.  I have only made a few of them because the few recipes I made went over so well, I didn't need to experiment further.  I had an urge to make muffins one weekend and pulled out a Minnesota cookbook and found this recipe for rhubarb muffins with a crackly topping.  They were cooling on the counter when a friend came over for dinner.  Drawn not only to my cooking, but baking as well, he asked if he could have one on his way out the door.  The answer of course was yes!  They were also shared with my coworkers as they too benefit from my overcooking for a two person household.

Rhubarb Muffins
(adapted from Always Superb by the Junior League of Minneapolis and St. Paul)

Yield: 16 muffins

2 1/2 cups flour
3/4 teaspoon baking soda
1 teaspoon salt
1 1/2 cups packed brown sugar
2/3 cup vegetable oil
1 cup buttermilk
1 egg, lightly beaten
1 teaspoon vanilla extract
1 1/2 cups chopped rhubarb
1/2 cup packed brown sugar

Mix the flour, baking soda and salt together.  Combine 1 1/2 cups brown sugar, oil, buttermilk, egg and vanilla in a separate bowl and mix well.  Stir in the flour mixture just until moist.  Fold in the rhubarb.  Fill prepared muffin cups 3/4 cup full.  Sprinkle 1/2 cup brown sugar over the tops of the muffin batter.  Bake at 325 F for about 30 minutes or until a toothpick inserted into the center comes out clean.  Remove from pan to rake for cooling.

Sunday, February 26, 2012

Making Homemade Cheese

Homemade cheese is something I never thought I would be doing or that I could do without a lot more things which I don't already have in my kitchen.  However, I was happy to find a couple of cheese recipes which do not require anything out of the ordinary.  This recipe for a simple cheese comes from a cookbook I recently purchased called Home Made by Yvette van Boven.  I was excited to read through this book as I love to make things from scratch.  Her photos and procedures are easy to follow and several of them have step by step procedures like the one for making the cheese.

The recipe is simple....4 cups milk and 4 cups buttermilk. Plus a few drops of lemon juice and a teaspoon salt.
 This is what is looks like as you heat the milk, buttermilk and lemon juice.  You can see the edges starting to separate into whey and curds.  Once they have separated you have curds.
 
 These are the curds which are left behind.  They are better known as ricotto cheese.  To continue to a block form, add the teaspoon salt and stir.  This is now lightly salted fresh cheese.

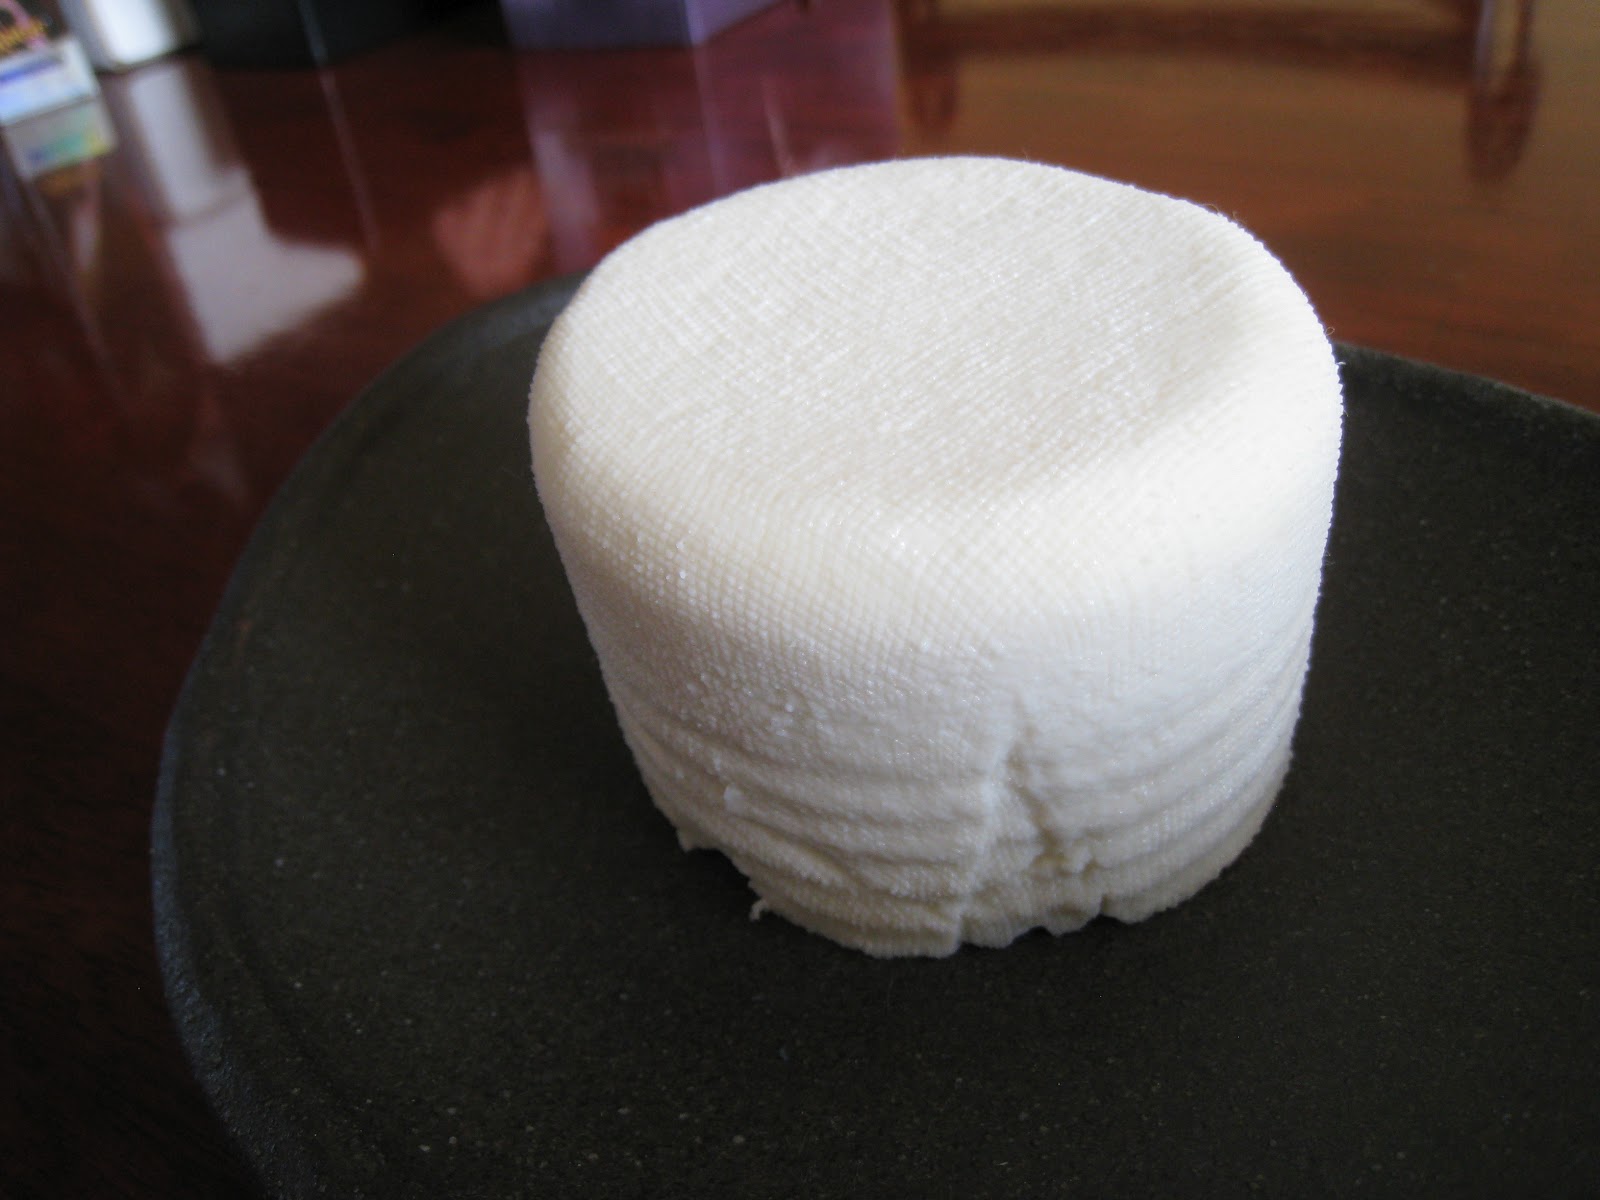
To actually make the form you will need a can with both ends cut off and cheese cloth.  You place the curds into the cheesecloth and place a weight on the can (with a plate below).  Keep the weight in place for about 12 hours and you will end up with a small block of cheese.  You can even see the pattern from the cheesecloth on the cheese.
 It makes about 8 ounces of fresh cheese.  I served it with the artisan bread that I have been making consistently now for a year.  It went vary well with the sesame version of it.  Enjoy!