Showing posts with label bread. Show all posts

Wednesday, June 24, 2015

Blueberry Brioche


I have read a lot of recipes about brioche.  I have also eaten my fair share of it, though I have never attempted before to make it, let alone a variation of the bread.  But when I saw the cover of Huckleberry, I knew that I would have to make it sooner or later.  I bought the book for a friend of mine as she has more time to bake than I.  Plus, when I have the time, I tend to be experimenting with dinner recipes rather than baking.   I also feel that baking isn't really where I need to spend my time learning as I have been baking since I was quite young.  My grandma lived on the same street, and she would often bake on Saturday morning.  When I was a little older I would bake with her.  She would make a full sized version of cinnamon rolls and then give me enough dough to make a miniature version which was all mine to eat.  So, while I enjoy baking, I really enjoy eating good food, so I spend my time on that endeavor instead of baking.


Blueberry Brioche
1 1/2 cups fresh blueberries
2 tablespoons milk
1 tablespoon active dry yeast
2 1/4 cups flour
6 tablespoons sugar, plus more for the top
1 teaspoon salt
3 eggs
1 egg yolk
10 tablespoons unsalted butter, soft
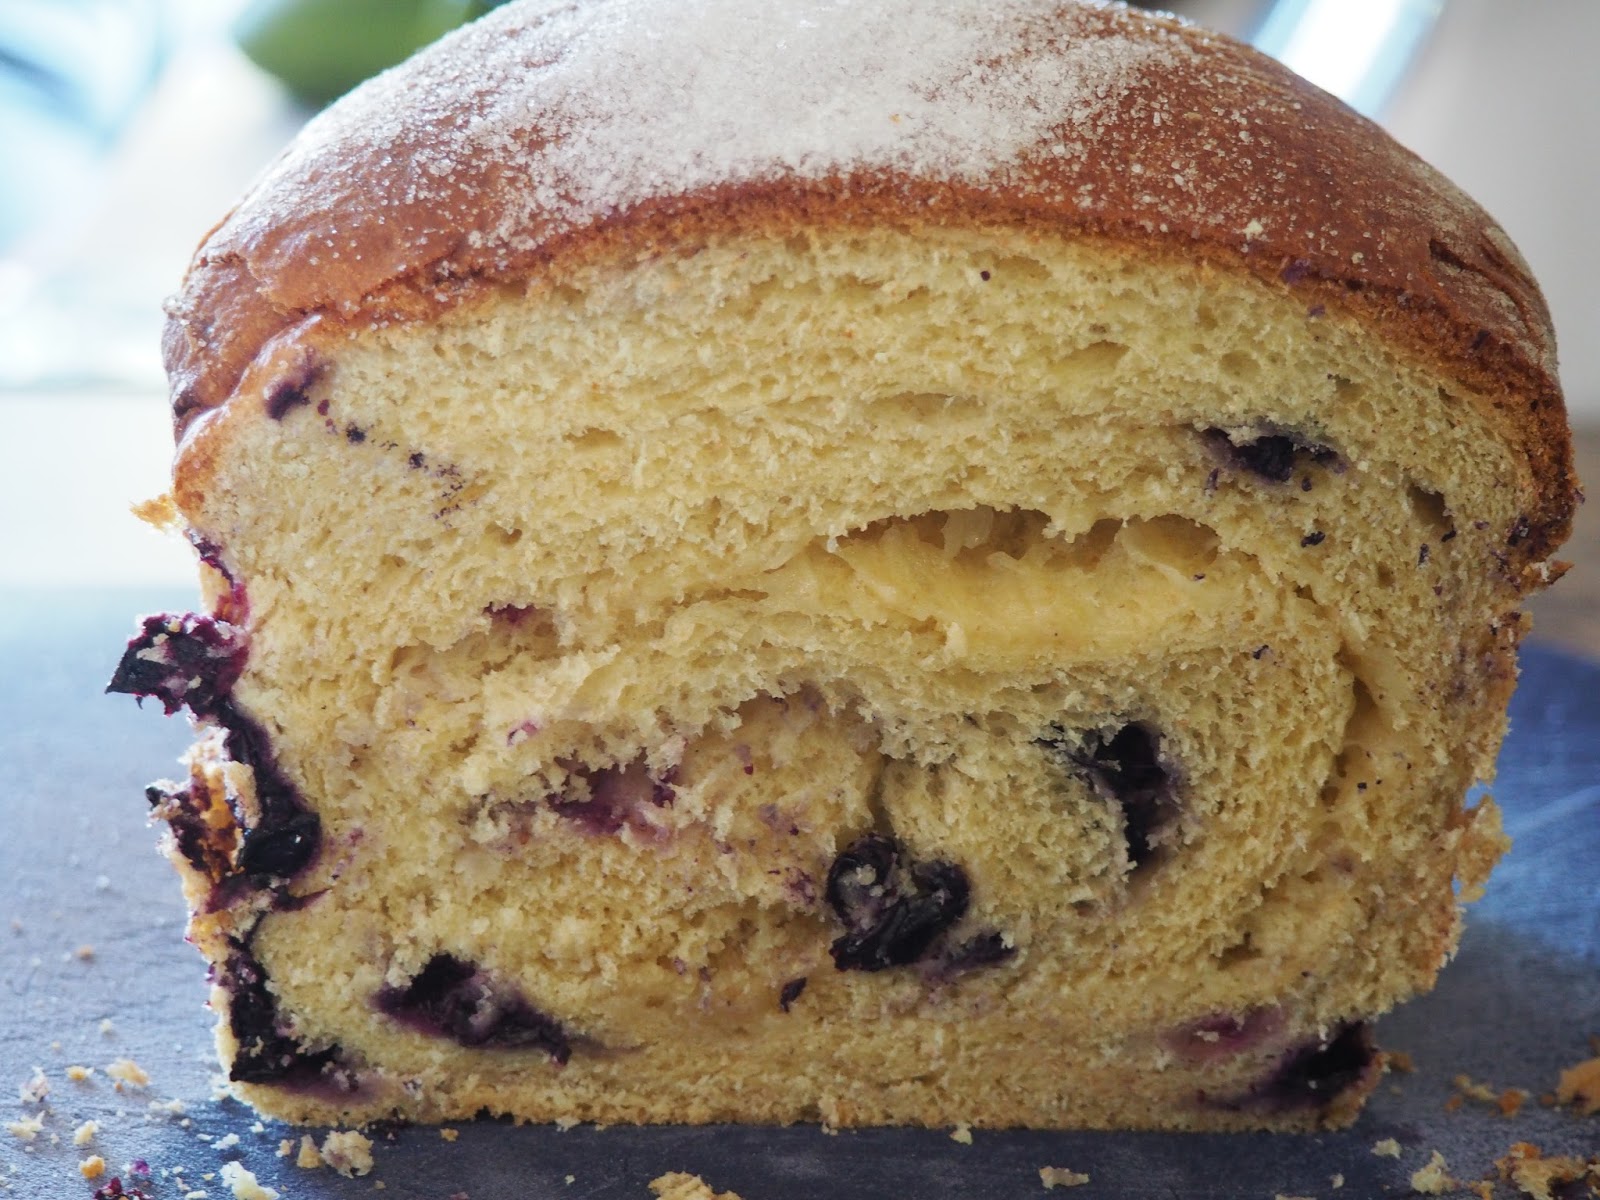


Place the fresh blueberries on a plate and freeze.  (Frozen blueberries are too watery, so freeze your own from fresh.  I often buy extra berries and freeze them immediate for use during the winter.)  Warm the milk to 105-115 F (warmer will kill the yeast).  Add milk to a mixing bowl and add the yeast.  Whisk to combine.  Add the flour, 2 tablespoons sugar, salt, eggs and egg yolk to the bowl.  Mix on low speed (with a dough hook) until the dough comes together, 1-2 minutes.


Increase speed to medium-low and work dough for 6 minutes.  Push the dough down the sides a few times during the 6 minutes.  Reduce speed to low and add the butter a little at a time over 2 minutes.  When the butter is beginning to be combined, increase speed to medium -high to fully mix in the butter, about 5 minutes.


Dump the dough on a lightly floured work surface and press into a 16 x 10 inch rectangle.  Distribute the blueberries and 2 tablespoons sugar along the top edge and gently roll down toward you into a log.


Place the log on a greased sheet pan, wrap in plastic and refrigerate for at least an hour or up to overnight.


Grease a 9 x 5 inch loaf pan.  Reshape the dough one more time by pressing into a 12 x 6 inch rectangle and cover with the remaining 2 tablespoons of sugar.  With the dough in a vertical position, roll it towards you tightly.  Place in the greased loaf pan, wrap loosely with plastic wrap and allow to rise in a warm place for about 3 hours or until double in size.
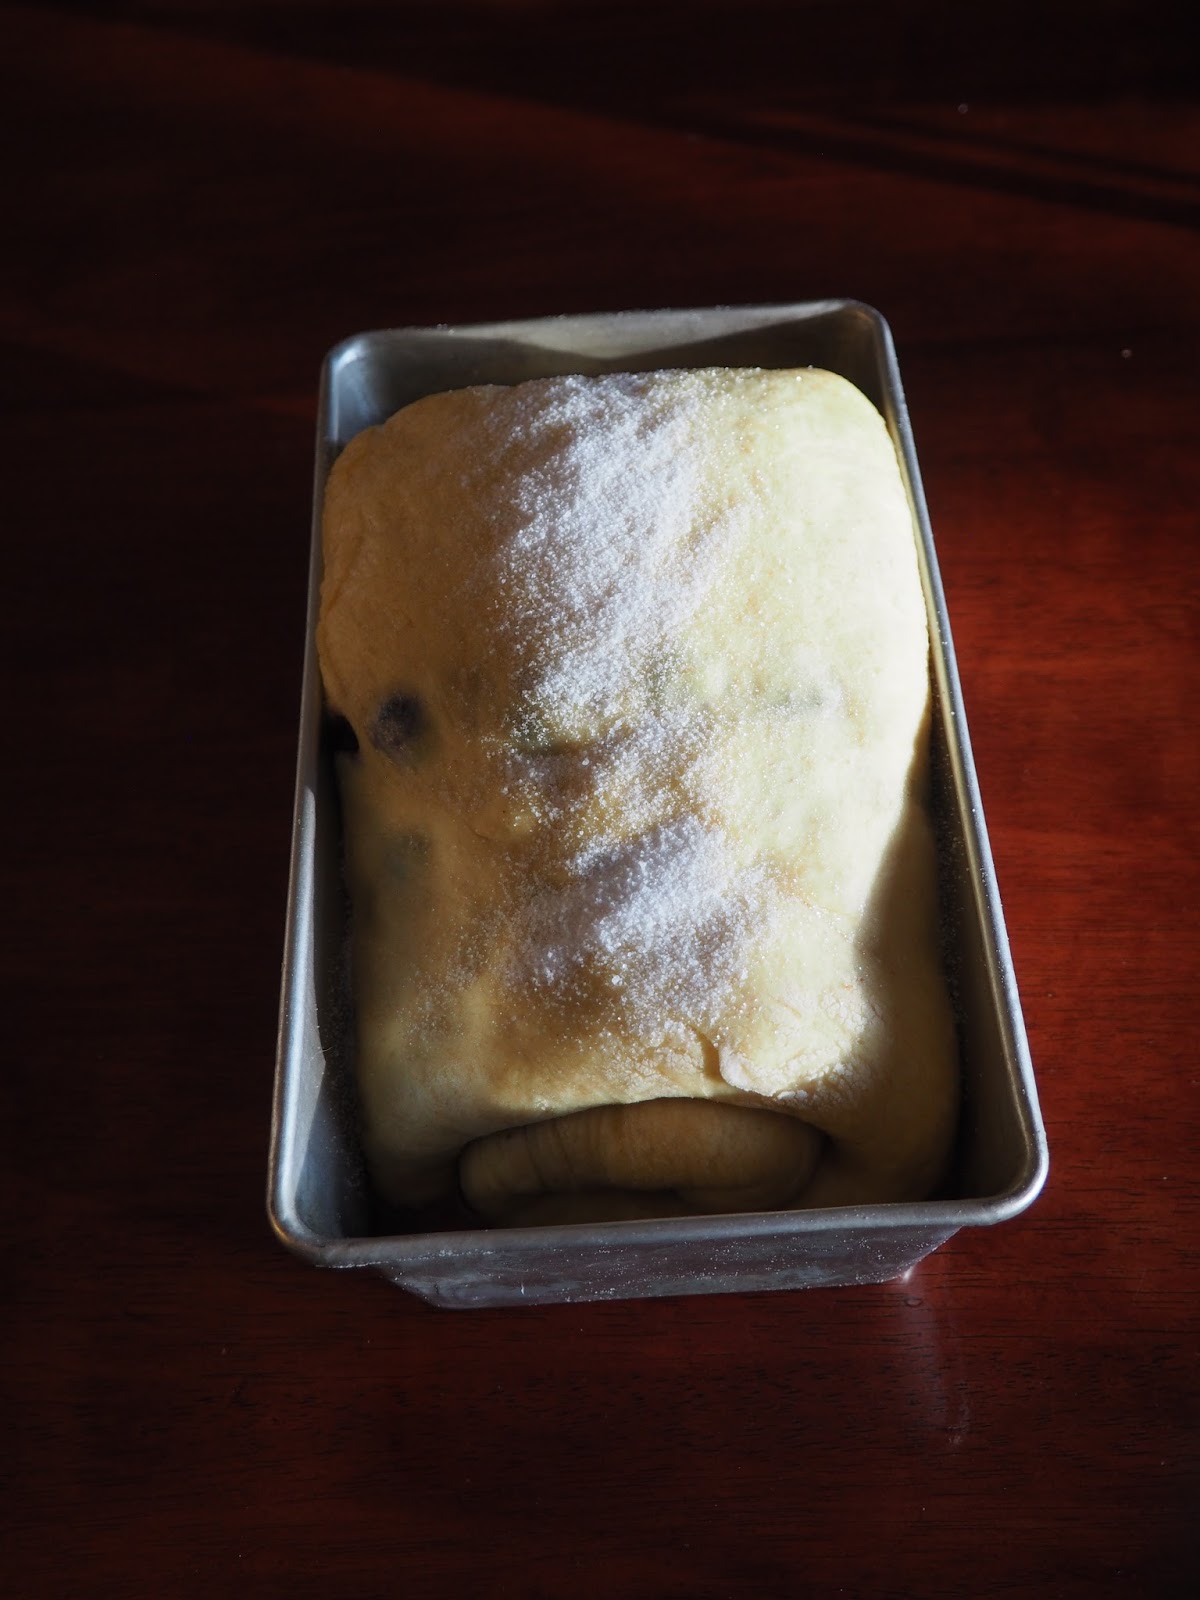

Preheat your oven to 350 F.  Brush the dough with some milk and dust with sugar.  (Don't let it pool.)  Bake until golden brown - about 45 minutes.  Allow to cool for about 15 minutes in the pan and then transfer to a cooling rack.


Wednesday, April 29, 2015

English Muffins


A while ago I struggled to get yeast to work with me.  It seemed that yeast was never going to cooperate, so I let it go.  My French bread tasted good, but just didn't have the airy deliciousness it should have.  Other breads didn't quite rise they way they should.  So I dropped yeast and yeast created items from my cooking and concentrated on cooking.  Then I decided I would try some simpler breads...first was Irish soda bread.  That turned out great; it was easy and tasty.  I thought maybe I should attempt yeast again.  I even made my own sourdough starter from scratch which basically takes natural yeast from the air, so you don't even need to buy any.  I continued to bake with yeast and things suddenly worked out.  I learned that bread and yeast can be very forgiving if you just are patient and watch how things are processing.  I still have mistakes here and there, but overall it just works out better now.


So, last weekend I decided I wanted to make English muffins.  I found a recipe from a book I have from the library, Huckleberry.  I had seen Huckleberry in a store a few weeks back, but thought that I wouldn't buy it for myself as I have a lot of baking books.  I did buy it for a friend as I knew she would like the things in there.  Once it arrived, I only took a morning to look through it before I shipped it to her.  Then, I kept thinking about those polka dot pages and decided to borrow it from the library, so I could spend more time reading through it to decide if I really wanted to own it.  The pictures are beautiful.  I couldn't get past the English muffin recipe, so I decide that I must make them.  They turned out beautifully and tomorrow my co-workers are going to get the benefit of me liking to spend time in my kitchen.

English Muffins
3 cups buttermilk
2 tablespoons active dry yeast
3 tablespoons unsalted butter at room temperature
3 1/2 tablespoons honey
6 1/4 cups flour
1/4 cup sugar
4 1/2 teaspoons salt
2/3 cup cornmeal

Warm 1 1/2 cups of buttermilk in the microwave, just until lukewarm (and a finger placed in it doesn't feel cold).  Be sure it doesn't get warmer than about 110 F or else the yeast will die.  Place 1 1/2 cups of the buttermilk in a kitchen aid bowl along with the 2 tablespoons of yeast.  Whisk to combine.  Add the warm buttermilk and whisk again to blend.  Add the butter, honey, flour, sugar and salt.  Mix on low speed with a dough hook for about a minute.  Once the dough has come together, turn the speed to medium and work the work for 1-2 additional minutes or until it is smooth.  Transfer the dough to a greased bowl.  Cover with plastic wrap and refrigerate for about an hour.

Remove dough from the refrigerator.  Sprinkle 1/3 cup of the cornmeal onto a clean work surface.  Dump the dough onto it.  Sprinkle the top with additional cornmeal.  Pat into a circle about an inch thick.  Sprinkle the remaining cornmeal onto a cookie sheet.  Cur into 3 inch rounds.  Be efficient as you cannot use any unused dough (due to the cornmeal being mixed in).  Arrange the muffins on a cookie sheet and let rise at room temperature for an hour.  (At this point you can also refrigerate and then let them rise at room temperature for an hour the next morning.)

About 30 minutes before you want to bake, preheat your oven to 350 F.  Heat a cast iron pan or griddle over medium high heat.  Drop the English muffins into the pan and cook for about 1 minute per side until each side is golden brown.

Return the muffins to the cookie sheet and immediately bake for about 10 minutes.  They should be light and fluffy when removed from the pan.  If you have more than one sheet bake it as soon as the last muffin comes off the pan.  Makes about a dozen.

(Note: I didn't want to waste the dough, so I did combine the dough into two additional muffins, but the insides had cornmeal throughout the dough, so was not the typical English muffin, but they baked up nicely.)  These will keep up to 3 days at room temperature.

Saturday, January 10, 2015

Lucia Bread (Saffron Rolls)

If you know a little about Swedish culture around Christmas, then you probably have heard of St. Lucia Day.  These saffron rolls are baked and eaten for St. Lucia Day.  It is technically on December 13th, but I baked these for my brunch on the 14th.  They were pretty easy to make and turned out very nicely.  A word to the warning though is that they stale very quickly and should be eaten on the same day as they are made.    You can add more raisins to the dough if you like, but I just used them on top as the decoration.  (This recipe is based on a recipe in The Great Scandinavian BakingBook by Beatrice Ojakangas.)  The picture above also shows Danish Rye Butter Buns.
Lucia Bread (Swedish Saffron Rolls)
2 packages active dry yeast
1/2 cup warm water (between 105-115 F)
1/2 cup sugar
1/2 cup melted butter
1 cup cream
1/4 teaspoon saffron strands ground in a mortar and pestle
2 eggs
48 raisins (or more if desired)
4 cups flour

Glaze for bread rolls:  (Beat together)
1 egg
milk


In a mixing bowl for a counter top mixer, dissolve the yeast in the warm water.  Add a little of the sugar (about a tablespoon to feed the yeast).  Let stand for about 5 minutes or until foamy.  Add the rest of the sugar, butter, cream, saffron, and eggs.  Beat well.  Stir in the flour, about 1 cup at a time until the dough is smooth and slightly shiny.  All the flour should be mixed in at this point.  Cover and refrigerate for at least 2 hours (up to 24 hours).  When you remove the dough from the refrigerator, divide dough into 24 pieces to then form into a S shape (see pictures).  (There are other shape variations you can make as well.  You can also divide into three and make one large loaf.)  Place a raisin on each end.  Brush with the glaze for the bread rolls and place in a warm place until doubled.  Preheat oven to 375F and bake for about 25-30 minutes or until golden.


Monday, November 11, 2013

Sun-dried pesto dinner rolls

I have been baking sourdough consistently now for a couple of years.  I don't bake every week, but every few weeks I will take the time and make 3-4 loaves of bread to eat over the next weeks or to bring to a party to share.  As much as I love sourdough, I want to spread my wings and bake more types of bread.  I have always aspired to be a proficient baker like my grandma.  I remember her baking nearly every weekend.  Maybe that isn't quite correct, but to my memory as a child, it seemed like she was always baking bread rolls or cinnamon rolls or other equally delicious things.  When I came across this recipe online I decided the time had come to try some dinner rolls.  A while back I had made Danish Rye Butter Buns (http://invitedtodinner.blogspot.com/2011/09/danish-rye-butter-buns.html) and they turned out wonderful.  The time came to bake rolls again.  Conveniently, I had homemade pesto in the refrigerator from my last batch of pesto.


Sun-Dried Tomato Pesto Dinner Rolls

Ingredients:
1 Tablespoon Active Dry Yeast
3/4 warm water (about 105F)
1/2 cup milk (preferably not skim)
1 large egg
1/2 diced sun-dried tomatoes (I bought them in a jars in strips and cut them into smaller pieces)
1/2 pesto (homemade is best!)
1/2 teaspoon salt
1 1/2 cups wheat flour
2 1/2 cups white flour
1/3 cup grated Parmesan cheese


Stir yeast and warm water together in a stand mixer bowl.  Let it sit until dissolved.  In another bowl whisk milk and egg.  Add this to the yeast mixture once the yeast is activated.  Stir together.  Stir in sun-dried tomatoes, pesto, salt and wheat flour into the liquid mixture.  Add white flour (start with 2 cups) until you have a floury dough.  Let the the dough rest for about 10 minutes.   Knead the dough with a dough hook on low speed until dough pulls away from sides (about 9 minutes).  You may need more flour depending on how wet your pesto is.

Cover and let rise until doubled in bulk - about an hour.  Dust your counter with flour and pull out the dough.  Divide dough into 12 pieces.  To shape each roll, you will make turns like when you rise a sourdough loaf.  Tuck the outside edges in until the roll is firm and will hold it's shape.

Preheat oven to 375 F.  Place into a parchment lined 9x12 pan.  Arrange in the pan with a little space between rolls, though they will come together as they rise.  Once all the rolls have been made and placed in the pan, let rise a second time until they fill the pan and are airy looking, about 35-40 minutes.  Once the rolls have risen, bake until they are golden brown, about 18 minutes.  Sprinkle the top with Parmesan and return to oven to melt the cheese.

Let the rolls cool on a rack for a few minutes.  They are best eaten the same day, but will last a couple of days if wrapped tightly.  Makes 12 rolls.

Sunday, September 8, 2013

Monica's Norwegian Bread

Monica's Norwegian Bread
I was visiting a friend of mine in Norway this year, and while I was there she made this bread.  We ate it many mornings we were there with all sorts of good things on top.  Now, in our house, it is called Monica's bread.  Monica's bread brings back the light filled days and nights of a summer in Norway.


This is a simple yeast bread to make and if you haven't liked baking bread or have not yet tried it, this is a nice one to start with as there is no kneading involved.  This is a more plain flavored bread, which means that it is wonderful to eat with other things piled high on it.  I just ate a piece of it with some freshly made ricotta cheese.  (You can read about homemade cheese on this page: http://invitedtodinner.blogspot.com/2012/02/making-homemade-cheese.html). Other things which I have recently piled on bread have been heirloom tomatoes (which have much better flavor than traditional ones) with a dash of feta cheese.

At any rate, while this bread must sit a while to rise, no kneading is required.  This recipe also makes three loaves, which you can eat up, give away or freeze, though it is always better eaten fresh.

Also, please note when making bread in particular it is best to have a scale to weigh the ingredients as it is a more precise way of baking and your results will be more similar, particularly if you grind your own grains.

Monica's Norwegian Bread
1 kg white flour
1 kg whole wheat flour
4 cups oatmeal
1 Tablespoons seeds (in this loaf I used sesame and sunflower as that is what I had on hand)
1 Tablespoon salt
7 grams dried yeast
2 liters room temperature water

Mix all the ingredients.  Leave the dough to sit at room temperature for at least 2 hours, though overnight is great too.   Pour the dough into three bread tins.  (I used parchment to be sure the bread would not stick, but there wasn't a problem getting it out of the tins.)  Put the loaves of bread into a cold oven.  Turn on the oven to 210F for 15 minutes.  After 15 minutes, turn the temperature up to 400F for 2 hours.

Makes 3 delicious loaves

Thursday, April 5, 2012

Chocolate Babka

Chocolate babka....I don't remember where I first read about it, but I do remember when I first tasted it.  It was almost Christmas one year and I was out running errands.  I wanted to buy some fresh bread because back in those days I was afraid of yeast since I had disastrous results when trying to use yeast.  I was in love with a sunflower bread that I discovered at one of the bakeries near my university.  So I stopped in the bakery, and every day during the week they would bake a specialty bread and that day was chocolate babka.  Oh, how I love chocolate and I remember the days when I was first introduced to nutella so I could eat chocolate and bread every day.  I remember in the summers during middle school where I would live off of chocolate and toast.  But this day in the bakery where two of my favorite things to eat came together, I was in love.

Eventually, I got over my fear of yeast, but I don't know why I never tried to bake a chocolate babka before now.  The scent of the bread and chocolate is still wafting through my house.  The loaves are left on my counter waiting to be eaten.  Now my task has been completed, and I will have chocolate babka for the next few days though my idea had been first to have it for Easter.  I may even freeze one for guests who will be coming soon.


Chocolate Babka
1 1/2 cups warm milk, 110 -115 degrees
2 (1/4 ounce each) packages active dry yeast
1 3/4 cups plus a pinch of sugar
3 whole large eggs, room temperature
2 large egg yolks, room temperature
6 cups all-purpose flour, plus more for work surface
1 teaspoon salt
1 3/4 cups (3 1/2 sticks) unsalted butter, cut into 1-inch pieces, room temperature, plus more for bowl and loaf pans
2 1/4 pounds semisweet chocolate, very finely chopped*
2 1/2 tablespoons ground cinnamon
1 tablespoon heavy cream


Pour warm milk (from 110-115F) into a small bowl. Sprinkle yeast and pinch of sugar over milk; let stand until foamy, about 5 minutes.  While the yeast is developing, in a small bowl whisk together 3/4 cup sugar, 2 eggs, and egg yolks.  After the yeast mixture is frothy, add the egg mixture to yeast mixture, and whisk to combine.

In the bowl of an electric mixer, combine flour and salt whisk quickly and then add the egg and yeast mixture.  Mix until flour has been incorporated.  Use the dough hook and add 2 sticks room temperature butter, and mix until flour mixture and butter are completely incorporated, and a smooth, soft dough that’s slightly sticky is formed, about 8-10 minutes.

Pour out the dough to a lightly floured surface and knead to renew tension in the dough.  Place in a buttered bowl (large enough for it to double).  Cover with plastic wrap and leave to rise in a warm spot.  I use the oven at about 75-80F.  This should take about an hour.

Place chocolate, remaining 1 cup sugar, and cinnamon in a large bowl, and stir to combine. Cut in remaining 1 1/2 sticks butter until well combined; set filling aside.  Grease three loaf pans (9x5inches).  Beat the last egg with 1 tablespoon cream and set aside.

Once the dough has double in size, punch it down and transfer to a lightly-floured surface. Let rest 5 minutes. Cut into 3 equal pieces. Keep 2 pieces covered with plastic wrap while working with the remaining piece. On floured surface, roll dough out into a 16-inch square; it should be 1/8 inch thick.

Use 1/3 of the chocolate mixture and spread onto the dough, leaving about 1/4 inch border. Brush the edge with egg wash and then roll up the dough.  Pinch the dough together to seal it along the seam and ends.  Twist the dough about 5 times.  Brush the top with more egg wash and crumble 1-2 tablespoons of chocolate mixture on half of the loaf.  Fold the half without the chocolate crumb over the other half and again pinch together edges and then twist the dough once or twice.  Place dough into prepared pan and repeat with the next two pieces of dough.

Heat oven to 350F. Brush the top of each loaf with egg wash.  Loosely cover each pan with plastic wrap, and let stand in a warm place 20 to 30 minutes.  Bake leaves for about 50 minutes at 350F.  Then lower the temperature to 325Fand bake the remaining 20 minutes until the loaves are a deep golden brown.   Remove from oven and cool on racks.  Loaves will freeze well for one month.

Tuesday, January 24, 2012

Pretzels

When I lived in Germany, I loved the soft pretzels from every bakery on every corner.  I ate them so often that I was convinced that they were not the same outside of Bavaria.  When I came across this recipe, I knew I had to try them to see if I could recreate the flavors and memories of Germany in my own kitchen.


The thing that amazed me the most was how incredibly simple the recipe is and how much they taste just like the ones you can buy.  The dough is easy to roll out and isn't sticky at all like many are as you are working with them.  The hardest part is waiting to put them in the oven and then again waiting until they are baked to eat them!

You can make them in any shape or size.  You can put anything on them you can think of that would taste great with bread.Keep in mind they will puff up like any other bread.
I really like the pretzel bites because they filled you up quite quickly!


Ingredients:
1 package instant yeast
¼ cup warm water (about 80 F)
2 teaspoons brown sugar
2 Tablespoons butter
1 Tablespoon salt (yes it is a lot)
5 ½ cups flour
Baking soda for boiling
1 beaten egg to spread on pretzels before baking.

Directions:
Place the yeast in 1/4 cup warm water and let it sit for about 5 min or until frothy.  Then add 5 ½ cups flour, 2 teaspoons brown sugar, and 1 Tablespoon salt.  Mix together by hand.  Add about 1 2/3 cups water and knead until the dough is not sticky.  It should take about 5 minutes with a dough hook, but I like to knead by hand until everything is incorporated and not sticking to the side of the bowl.  Let rise in a warm place (about 80F) for about an hour or until about double in size.

While the dough is rising pull out sesame seeds, fennel, cheese and sea salt (or kosher) to decorate the pretzels with after their baking soda bath.

Once the bread has doubled, prepare the baking soda bath.  Pour the baking soda into the water (ratio 1 cup water to 1.5 tablespoons baking soda).  I used 9 tablespoons of baking soda for a 6 cup of water bath.  Bring to a simmer over medium-high heat.

Work the dough into pretzel shapes, pretzel bites, or whatever shape you would like.  Drop into the baking soda bath and remove once the dough is floating gently on the top of the water.  This should take 30-60 seconds.

Preheat oven to 425 F.  Place pretzels from the baking soda bath onto parchment paper.  Brush with the egg wash and decorate with salt, cheese or whatever you would like.  Bake for about 15 minutes or until golden brown.

Wednesday, September 28, 2011

Danish Rye Butter Buns

When I was young, my family lived on the same street as my grandparents.  I loved to go to my grandma's on Saturday morning when she was in the kitchen baking.  The kitchen always smelled so good!  I was able to sit at the kitchen table and play cards with my great-grandma while my grandma baked away.  When I got a little older, my grandma let me bake with her.  One the the things that I learned from my grandma was how to cut bread.  She let me make a small version of whatever she was making.  One day we were baking cinnamon rolls.  I remember her large pan ready for rising while she showed me how to cut my small roll into individual rolls.  She gave me a piece of string and watched me pull it through the bread for a gentle, but effective cut.

As I grew older, I tried to make bread several times and it never quite turned out for me, so I quit making bread from scratch.  It always bothered me because friends and family who know me, know I like to bake and cook everything I can from scratch.  I wasn't going to let yeast things scare me anymore and started this year with artesian bread which turn out wonderful, delicious and not difficult to make at all.  These rolls also come from Beatrice Ojakangas' book Scandinavian Feast.  The name is right on as there are 5 sticks of butter used in this recipe, but it will be difficult to actually stop eating these rolls.


Danish Rye Butter Buns

2 packages active dry yeast
½ cup warm water (about 110F)
1 cup warm milk (About 110F)
2 tablespoons sugar
1 teaspoon salt
2 eggs
1 stick butter, melted
2 cups rye flour
4 cups white flour
3 sticks cold butter
1 stick butter, softened

In a medium bowl, dissolve the yeast in water.  Add the milk, sugar, and salt and let stand for about 5 minutes or until the yeast foams.  Beat in the eggs, melted butter and 1 cup of the rye flour.  Measure the remaining rye and white flour in a large bowl.  Cut the cold butter into the flour mixture.  Pour the yeast mixture over the flour mixture.  Carefully fold the two mixtures together until just moistened.  Cover the bowl and refrigerate for at minimum 4 hour and up to 2 days.

When ready to shape the dough, turn it out onto a lightly floured board.  Knead gently to get rid of any air bubbles.  Divide the dough into four parts.  Roll the dough out to make a 15 inch circle.  With a butter knife, spread the surface of the circle with 1 tablespoon of the soft butter.  Fold the circle into thirds and roll it out into a 24 inch square.  Fold into thirds again to make a square about 15-16 inches wide.  Spread the surface with another tablespoon of the softened butter.  Roll up the dough (Jelly-roll style).  Cut into 8 pieces and place seam side down onto a baking sheet to rise.  Repeat with remaining three pieces of dough.  Let rise in a warm place until doubled in size (about 2 hours).  Preheat oven to 400F.  Brush the buns with a beaten egg and sprinkle with a coarse salt.  Bake for about 15 minutes or until golden and crusty.  Remove from oven and cool on racks.  Serve warm or cooled.
Makes 32 buns