Sunday, October 25, 2015

Pumpkin Muffins

It's pumpkin season!  You can see everything pumpkin at every grocery store.  So here is my contribution to pumpkin season....pumpkin muffins.  These are based off the recipe in The Natural Cook by Tom Hunt.  They are flavorful and moist...the only bad part is that they don't last long.  Next time I would consider making a double batch so there are more of them and so that they use up more pumpkin, though the pumpkin flavor comes right on through.

So go celebrate the autumn with some freshly made pumpkin muffins.  They are a hit with anyone who likes moist pumpkin muffins or bread.


Pumpkin Muffins
1 cup pureed pumpkin
4 tablespoons unsalted butter
3/4 cup spelt flour (or whole wheat)
1/3 cup raw cane sugar
1 large egg, beaten
1 1/2 teaspoons baking powder
1/4 teaspoon baking soda
1/2 teaspoon allspice
3 tablespoons Greek yogurt
1 teaspoon cinnamon

Preheat oven to 350F.  Butter 12-16 muffin tin cups (depending on how much batter you place in each spot).    Sprinkle flour into the muffin tin and tap out excess.

Beat the butter and sugar for a couple of minutes until light and fluffy.  Add the egg, flour, baking powder, baking soda, all spice, yogurt, pumpkin and half of your cinnamon.  Stir together until well incorporated.

Fill the muffin cups about half full and bake for about 20-25 minutes.  Remove from oven and from the muffin tin.  Melt a little butter and brush the top of the muffins.  Then sprinkle with remaining cinnamon (with some sugar) for some sweetness and crunch.

These are best warm from the oven, but will keep a couple of days (if not eaten) in an air tight container.


Saturday, August 22, 2015

Sugar Cookie Rollouts

This is the best recipe for sugar cookies I have found.  It is the one my grandma, aunt and mom all use when they bake rollouts.  Here are some photos. I have a ton of different cookie cutters, so I make these cookies throughout the year.  Not only is the dough just wonderful to eat by itself, but they almond and vanilla flavors shine once baked.  Plus, you can use whatever frosting you like best or even better make your own.  When I am being lazy I used store bought cream cheese flavored as it compliments the almond flavor well.


Sugar Cookie Rollouts
1  1/2 cups powdered sugar
1 cup butter, softened
1 teaspoon vanilla
1/2 teaspoon almond extract
1 egg
2  1/2 cups flour
1/2  teaspoon baking soda


1 teaspoon cream of tartar (sometimes I omit this if I don't have any)
granulated sugar

Beat powdered sugar and butter until creamed.  Stir in vanilla, almond and egg.  Stir in flour, baking soda and cream of tartar (if using).  Cover and refrigerate for at least 2 hours (until firm).  (Sometimes I leave it overnight.)

Heat oven to 375 F.  Roll half the dough at a time.  You want it about 1/8 inch thick on lightly floured counter.  Cut into shapes.  Place about 2 inches apart on a ungreased cookie sheet.  Sprinkle with sugar or wait until baked and cooled to frost.  Bake for 7-8 minutes or until just turning light brown.  Remove from the cookie sheet to a wire rack until cooled.


Blackberry Muffins

I like to collect berries whenever I can find them in good condition and on sale.  I freeze them for future use, which works out great when I have them throughout part of the winter as it brings back memories of the warm weather that brings so many good fruits and vegetables.  I also like to freeze blueberries as they freeze exceptionally well.  Plus, both blackberries and blueberries can be used from frozen without the need to thaw beforehand.  Though blackberries are still available fresh, I used frozen ones here as I wanted to rotate my stock and not leave the older ones still sitting in the freezer.  Plus, I like to add a lot of berries to anything that requests them as the juice add both flavor and moisture.  This recipe is adapted from at home in the whole food kitchen and comes together quickly.  I made smaller muffins than the recipe originally called for as I find them very filling, but you can easily make larger one if you so desire!


Blackberry Cornmeal Muffins
1 1/2 tablespoon ground chia seeds
1/2 cup almond milk
1/3 cup yellow cornmeal (I used fine ground)
1 1/2 cups spelt flour
3/4 tablespoon baking powder
1/2 cup ground almonds (almond meal)
zest of 1 orange
1/2 cup orange juice (from the orange you just zested)
1/3 cup coconut oil (melted)
1/3 cup maple syrup
1 tablespoon vanilla extract
1/4 teaspoon salt
3 cups blackberries

Preheat oven to 350 F.  Line a muffin pan with silicone lines (or you can use paper ones too).  Set aside.

Whisk ground chia seeds and almond milk together in a medium bowl.  Let rest for 10 minutes to thicken.  In a medium bowl, place the cornmeal, spelt flour and baking powder.  Add the almond meal and whisk to combine to break up any lumps.  Add the orange zest, orange juice, coconut oil, maple syrup, vanilla and salt to the chia seed and almond milk mixture.  Whisk to combine.  Add the dry ingredients and stir just until combined.  Add the blackberries and stir until evenly distributed.


Spoon the batter into the muffin cups, filling to the top (as they won't expand much).  Bake for about 25-30 minutes, but this depends on how many you are making.  If you are making bigger muffins, you will need an extra 5 minutes or so.  Bake until a toothpick inserted into the middle comes out clean.  Remove from oven and let sit for 5 minutes before serving (or transfer to a wire rack to cool).  Like most baked goods, these are best the day baked, but will last a couple of days if left in an air tight container, but just left on my counter they disappeared quickly.  (This made about 16 smaller muffins.)


Thursday, July 30, 2015

Apple Fritters

Recently, since I have had more time, I have been reading more cookbooks.  Also, I have been craving something fried.  So bring the two together and  you have apple fritters.  This is a bit odd for me to make since I don't like cooked apples, but the apples bits are small and nicely speckled throughout the fritters.  This recipe is adapted from one in Cook's Country.  The nice thing about these is that it is a small recipe and therefore I didn't feel bad about making them and trying to figure out what to do with the leftovers.  I quite like treats like this or other baked goods, but don't like that most baked goods make so much that two people can't possibly eat as much as the recipe makes.  But I am pretty sure my co-workers don't complain when I bring extra goodies to work.  All the better when it is a surprise and they walk into the break room with something good to start the day.

This recipe came together quickly.  When frying the fritters, they stuck together really well so that there was very little cleaning of the oil to worry about, so I can easily reuse the oil for another batch at a later time or some other delicious treat which may appear here as well in the next few months.  Plus, you only need one apple to put these together.  For your next fried craving, try some apple fritters.

Apple Fritters
1 granny smith apple, peeled, cored and cut into small pieces
1 cup flour
3 tablespoons sugar
1/2 tablespoon baking powder
1/2 teaspoon salt
1 teaspoon cinnamon
1/4 teaspoon nutmeg (freshly ground is better)
6 tablespoons orange juice (or apple juice or cider)
1 egg, lightly beaten
1 tablespoon unsalted butter, melted
3 cup canola oil for frying

Glaze (if desired)
1 cup powdered sugar
2 tablespoons apple cider
1/4 teaspoon ground cinnamon
1/8 teaspoon nutmeg


Spread the apples in a single layer on paper towels to thoroughly dry them off.  In a medium bowl combine the flour, sugar, baking powder, salt, cinnamon and nutmeg in a large bowl.  In a small bowl, whisk together orange juice, egg, and melted butter.  Stir apples into the flour mixture.  Stir the orange juice mixture into the flour and apple mixture.


Set a wire rack over paper towels.  Heat oil in a dutch oven or similar pot until 350 F.  Divide batter into 5 equal portions.  Place batter into the heated oil and smooth the top.  Be sure to keep the temperature between 325 and 350.  Fry until golden brown, about 3 minutes per side.  Transfer to the wire rack to cool. 


If you are using the glaze, whisk together sugar, cider, cinnamon and nutmeg until smooth.  Top each fritter with about 1 tablespoon glaze.  Let set for about 10 minutes before serving.

Wednesday, July 29, 2015

Grains, Greens and Scrambled Eggs

Since I have been on my farro kick all summer, I have made this greens and grains dish many times for breakfast throughout the summer.  It started out to be a cooler summer, so a nice warm dish which comes together so quickly was just what I was craving many times this summer.  It is a filling dish with the protein and grains, but also gives that boost of greens which I often crave.  This is another recipe adapted from Whole Grain Mornings, but there are so many grains to try that you can easily substitute whatever you have been cooking recently as long as you have some leftover!

Greens and Grains
1-2 large eggs, beaten
1 tablespoon milk
1-2 pinches salt
1 tablespoon olive oil
1 green onion, finely chopped
2 cloves garlic, minced
1/2 cup (or as much as desired) packed greens (I like arugula or spinach)
1/4 cup cooked whole grains (I used farro, but barley or wheat berries would be good)
1 tablespoon chives, chopped
salt and pepper to taste

In a small bowl, whisk together milk, salt and egg(s).  Heat about 1/2 tablespoon of the olive oil over medium heat.  When the oil is hot, add the green onion and garlic and cook for about 1 minute.  Add the remaining 1/2 tablespoon oil then the grains and greens.  Cook until warmed throughout, about 3-5 minutes.  Decrease heat to low and add the egg mixture.  Stir until they are cooked, 2-3 minutes.  Remove from heat, add pepper and salt to taste.  Add the chopped chives.

Serves 1, but can easily doubled to serve two.

Tuesday, July 28, 2015

Blueberry Breakfast Bars

I love fruit, but one of the most versatile fruits that I love are blueberries.  They are sweet and are easy to freeze.  In fact, I stock up in summer so I can use them all winter long.  This recipe using blueberries is adapted from Whole Grain Mornings.  It combines my love of blueberries with my love of eating breakfast.  Sometimes I want something sweet, but sometimes I want something savory.  There are both here.  These particular blueberry breakfast bars remind me of the not so great bars you can buy in the store, except these are much better for you and just taste that much better!


Blueberry Breakfast Bars
3 cups fresh blueberries
1/4 cup natural cane sugar
3 tablespoons flour
2 tablespoons from 1/2 a fresh squeezed lemon
1 tablespoon freshly grated lemon zest
1 teaspoon water
1 1/4 cup rolled oats
3/4 cup sliced almonds, toasted
1/4 cup sesame seeds, toasted
3/4 cup wheat flour
1/2 cup brown sugar
1 teaspoon cinnamon
1 teaspoon salt
3/4 teaspoon baking powder
1 large egg, beaten
8 tablespoon cold unsalted butter
3-4 tablespoon ice water

Preheat oven to 350 F.  Butter an 8 inch pan.

For the filling: In a saucepan, combine the berries, sugar, flour, lemon juice, lemon zest, and water.  Stir over medium heat until the mixture begins to simmer.  Continue stirring until berries begin to break down and sauce thickens, about 3-5 minutes.  Remove from heat.


For the crust: In a food processor pulse together rolled oats, almonds, sesame seeds until they are chunky, about 30 seconds.  Add the flour, brown sugar, cinnamon, salt, and baking powder and pulse a few times more.  Add the egg and butter and pulse until the mixture is the consistency of large crumbs.

To assemble: Press half the crust mixture into the prepared pan.  Pour the berry filling on top and spread evenly.  Scatter the remainder of the crust mixture across the top.

Bake until the top is golden brown, about 30 minutes.  Let cool completely in the pan.  Slice into bars.


Pesto Stuffed Flank Steak

I am not a big meat eater, though at times the mood strikes me for a really good steak.  This recipe is for a grilled flank steak which is perfect for summer, particularly because it is stuffed with basil and parsley which are in season in your own back yard right now.  Throw it on the grill with your favorite grilled vegetable(s) and you have yourself a quick meal which doesn't require you to turn on your oven in the already hot summer.

Adapted from a recipe in the cookbook Canal House Cooks every day by Hamilton and Hirsheimer.

Pesto stuffed Flank Steak
2 loosely packed cups basil leaves
2 loosely packed cups fresh parsley leaves
2 cloves garlic, peeled
3 anchovy fillets
1/4 cup olive oil
1/2 cup Parmesan
2 lb. flank steak
salt and pepper to taste


For the pesto, puree the basil, parsley, garlic and anchovy fillets in a food processor.  Add the Parmesan and pulse a couple of more times.  Use right away on the flank steak or remove to a small bowl and cover (as air will turn the pesto dark).


Butterfly the flank steak, opening the steak as you slice, but stop about 1/2 inch from cutting the steam into two pieces.  Press the meat flat.  Season both sides with salt and pepper.  Spread the pesto onto the meat, leaving about 1 inch space all around the edges.  Roll up the steak and tie with kitchen string every two inches.  Wrap in plastic until ready to grill.


Preheat the grill so it is medium hot.  Place the steak on the grill and turn it until it is browned on all sides, about 10 minutes.  Remove from the flame, but remain on the grill and let rest for about 10 more minutes.  Place steak on a cutting board and let rest another 10 minutes before slicing into 1-2 inch rounds.


Monday, July 27, 2015

Sesame Seed Farro Bowl with Cucumbers

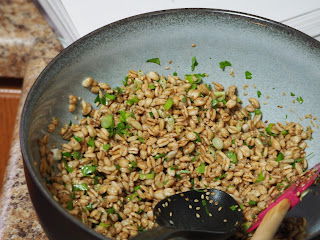
In my search to use more whole grains, I came across the cookbook the whole food kitchen by amy chaplin.  This recipe uses one of my favorite grains, farro, as the basis for the salad.  The best part is that the only cooking required is the farro and it can be done in advance since it is a room temperature or cold salad.  The sesame seeds in this recipe make it smell deliciously nutty (though there aren't any nuts) and the soy sauce adds a bit of a salty flavor with more depth.  It also keeps well so you can eat this again and several days later after cutting up additional tomatoes and cucumbers.  It has become one of the salads for the summer as I have already made it several times.  If you like farro, you should try this one out.


Parsley Farro Salad with Sesame Seeds
2 1/2 cups cooked farro, cooled
1 1/2 teaspoons red wine vinegar with pomegranate (or just red wine vinegar)
1 1/2 tablespoons rice vinegar
1 teaspoon light soy sauce (or 1/2 teaspoon tamari)
3/4 tablespoon olive oil
3 tablespoon toasted sesame seeds
1 scallion, finely chopped (more for garnish or reserve some for garnish)
1/2 cup finely chopped flat leaf parsley (and a little more for garnish)
1 - 1 2/c cups cherry tomatoes, halved
1 medium cucumber, diced
Additional olive oil or flax oil drizzled on top to serve (if desired)


Place cooled farro in a medium-large bowl.  Sprinkle red wine vinegar, rice vinegar, soy sauce and olive oil over the farro and stir to combine.  Add toasted sesame seeds, parsley, and scallions.  Mix again.  Season to taste with additional soy sauce.  Spoon into bowls and top with cherry tomatoes, cucumbers, additional parsley, additional scallions.  Drizzle (if desired) with flax or olive oil and serve.  (Serves 3-4)

Thursday, July 9, 2015

Tortilla Soup


Somewhere I was introduced to chicken tortilla soup.  I have since been obsessed with finding what I believe is the best tortilla soup.  I still haven't found it because this one is a vegetarian (or easily can be) version.  I think I will have to try it with chicken to see if it approaches what I have in my head as the perfect chicken tortilla.  At any rate, this recipe based off one in Thug Kitchen, is a delicious, hearty soup.  I have been feeling the need for something filling and warm since the days have been rainy and cool.  This satisfies my desires for hearty, healthy and warm.  I love seeing the piles of cut vegetables just waiting to be turned into something else entirely.  Sometimes when I am grocery shopping I wonder how vegetables have gotten so expensive, but when you compare to any single piece of meat, they aren't.  So buying a pile of them and then dicing them and cooking all the colors together is just so satisfying that I do it all over again in a different combination.  So when we are craving a hearty vegetable soup, this one works well and it comes together quickly.  Give it a try!

Tortilla Soup

serves 4-6

1 yellow onion, diced

10 baby carrots or 1 medium carrot, diced
1 red, yellow or orange bell pepper, diced
2 jalapenos, finely diced
5 cloves garlic, minced
1 tablespoon olive oil
3 teaspoons ground cumin
2 1/2 teaspoons dried oregano
2 1/2 teaspoons chili powder
1/8 teaspoon salt
1 can (about 15 oz.) fire roasted diced tomatoes
1 6 oz can tomato paste
5 cups stock (vegetable or chicken)
1 tablespoon freshly squeezed lime juice from 1/2 a lime
6 corn tortillas, cut into 1 inch squares
1 15 oz. can chickpeas
Toppings: cilantro, avocado, sour cream, jalapenos, etc.


In a large soup pot, saute the onion in oil until it is a little see-through, about 3 minutes.  Add the bell pepper and carrot and cook until everything begins to brown (about 3 more minutes).  Add the jalapenos, garlic, spices and salt and cook for another 30 seconds.  Add the diced tomatoes and tomato paste.  Stir well so it is evenly distributed.  Add the stock and bring to a simmer.  After simmering for a few minutes, add the lime juice and cut corn tortillas.  Stir and then let simmer for another 10 minutes.  (At this point you can puree until everything is smooth or leave it chunky as I did.)  Taste and add spices as needed.  Remove from heat and serve with chickpeas, cilantro, avocado or whatever toppings you desire.


Wednesday, July 8, 2015

Scrambled Eggs with Greens and Grains


My husband and I have been traveling a number of weekends in a row.  When we get home I am not very inspired to cook until I have had a day of rest, so I asked him what he wanted for dinner the next night.  We had just eaten pasta, which is one of the only things that he cooks, when I asked him what he wanted.  He replied with grains.  I asked for more information and he said that he used to be satisfied with just pasta, pasta and more pasta, but that I have introduced a lot of variety into his diet and now he wanted some of that variety.  So as I was looking through recipes with grains, I remembered Whole Grain Mornings and was determined to have a hot breakfast this morning which would warm me from the inside out.  This is really an easy recipe to throw together especially if you have just a little bit of grains left over from some other recipe.  I didn't, so I cooked up just 1/3 cup of farro, which is one of my most favorite grains.  That 1/3 cup cooked up to quite a bit more than I wanted for just one serving, so I will be eating these scrambled eggs again very soon.


Scrambled Eggs with Greens and Grains
Serves 1 (easily doubled to serve 2)

2 eggs, beaten
1/2 tablespoon milk
1/8 teaspoon salt
1 tablespoon olive oil
1 green onion, finely chopped
2 cloves garlic, finely minced
1 cup (or two handfuls) greens (I used arugula, but you can also use spinach, Swiss chard, etc.)
1/4 cup cooked grains (I used farro, but you can use wheat berries or barley too)
1 tablespoon fresh chopped chives
pepper and salt to taste


Whisk together eggs, milk and salt.  Heat the tablespoon of oil over medium heat.  Saute the green onion and garlic until soft, about 1 minute (as it will continue to cook with the greens).  Add the greens and grain and saute.  (You can add a little more olive oil if you need to.)  When the greens are wilted and grains warm, decrease the heat to low and pour in the egg mixture.  Stir eggs until they are lightly scrambled, 2-3 minutes.  Remove from heat, sprinkle on the chives, salt and pepper to taste.  Serve right away with crusty bread if desired.

Tuesday, July 7, 2015

Roasted Vegetable Quinoa Salad

So now you have made your own harissa.  What can you do with it?  Harissa has a bit of a kick due to chilies which are in it.  Below is a recipe which conveniently uses exactly the same amount as the harissa recipe I posted.  This also is based upon at home in the whole food kitchen.  This recipe uses a bunch of fresh vegetables which are then roasted to bring out their sweetness, tossed with quinoa and harissa to balance out the flavors.  It also store well and although best eaten at room temperature, it is also delicious cold if you are like me and can't wait for it to be brought to room temperature before eating it.

Roasted Vegetable Quinoa Salad with Harissa
serves 4-6

2 medium zucchini, cut into 1 inch pieces
2 medium red, orange or yellow peppers, seed and cut into 1 inch pieces
2 cups cherry tomatoes
5 -6 tablespoons olive oil, divided
sea salt
1 medium onion, cut into 1/2 inch wedges
4 cups cooked quinoa, cooled to room temperature
1/3 cup harissa
1/2 cup chopped flat leafed parsley
5 oz. feta cheese (I really like the 360 brand at whole foods)


Preheat oven to 400 F.  Line 2 baking sheet with parchment paper.  Place zucchini, peppers, tomatoes in a large bowl and toss with 3-4 tablespoons olive oil and about a 1/2 teaspoons salt.  Divide the vegetables between the two parchment lined baking sheets and place in the preheated oven to roast for about 30 minutes.  Be sure vegetables are in a single flat layer or it will roast unevenly.  Stir vegetables every 10 minutes to ensure even browning.  Once vegetables are lightly browned, remove from oven and set aside to cool to room temperature.

Warm the remaining 2 tablespoons of olive oil in a skillet over medium heat.  Once the oil is hot, add the onion and saute for about 5-6 minutes or until just turning lightly brown.  Cook on lower heat for another 10-15 minutes to caramelize the onions.  Stir every couple of minutes to ensure that the onion doesn't burn.

Transfer quinoa to a large bowl.  Fluff with a fork and then add the harissa to the quinoa.  Mix well.  Add the roasted vegetables, onion and parsley.  Toss to combine.  Taste and season with salt as needed.  Crumble the feta cheese over the top.


Tuesday, June 30, 2015

Homemade Harissa

Over the past year or more I have been reading more and more about harissa.  I never had tasted it, but figured it should be something that I should try.  I have found dozens upon dozens of recipes using harissa as one of the ingredients, but it wasn't until I was reading At Home in the Whole Food Kitchen, that I actually came across a recipe for it.  I was so thankful to actually have a recipe which to base the flavors off of that I knew I would have to make it.  Besides, it contains all things that I already have in my pantry so why would I go and buy something which I could make in a few minutes at home with ingredients I already had on hand.  At any rate, it is a simple spice mixture to make and delicious and as spicy as you want it to be.
Homemade Harissa
Makes about 1/3 cup

1 tablespoons cumin seeds
1 tablespoon caraway seeds
3/4 tablespoon ground coriander
2 teaspoon ground paprika
1/2 teaspoon cayenne pepper (or more if you like it spicy)
2 garlic cloves, minced finely
1/8 teaspoon salt
1/4 cup olive oil
1 tablespoon freshly squeezed lemon juice

Warm a small skillet over medium heat and toast the cumin and coriander seeds.  This will take about 2 minutes.  Stir constantly until fragrant.  Transfer seeds to a grinder and grind into a powder.  Add add ingredients to a bowl and stir until smooth.  This makes 1/3 cup and will keep in a tightly covered container in the refrigerator for about 2 months.  You can also reduce the amount of olive oil to make it more of a paste if that is what you need in your recipe.


Wednesday, June 24, 2015

Blueberry Brioche


I have read a lot of recipes about brioche.  I have also eaten my fair share of it, though I have never attempted before to make it, let alone a variation of the bread.  But when I saw the cover of Huckleberry, I knew that I would have to make it sooner or later.  I bought the book for a friend of mine as she has more time to bake than I.  Plus, when I have the time, I tend to be experimenting with dinner recipes rather than baking.   I also feel that baking isn't really where I need to spend my time learning as I have been baking since I was quite young.  My grandma lived on the same street, and she would often bake on Saturday morning.  When I was a little older I would bake with her.  She would make a full sized version of cinnamon rolls and then give me enough dough to make a miniature version which was all mine to eat.  So, while I enjoy baking, I really enjoy eating good food, so I spend my time on that endeavor instead of baking.


Blueberry Brioche
1 1/2 cups fresh blueberries
2 tablespoons milk
1 tablespoon active dry yeast
2 1/4 cups flour
6 tablespoons sugar, plus more for the top
1 teaspoon salt
3 eggs
1 egg yolk
10 tablespoons unsalted butter, soft


Place the fresh blueberries on a plate and freeze.  (Frozen blueberries are too watery, so freeze your own from fresh.  I often buy extra berries and freeze them immediate for use during the winter.)  Warm the milk to 105-115 F (warmer will kill the yeast).  Add milk to a mixing bowl and add the yeast.  Whisk to combine.  Add the flour, 2 tablespoons sugar, salt, eggs and egg yolk to the bowl.  Mix on low speed (with a dough hook) until the dough comes together, 1-2 minutes.


Increase speed to medium-low and work dough for 6 minutes.  Push the dough down the sides a few times during the 6 minutes.  Reduce speed to low and add the butter a little at a time over 2 minutes.  When the butter is beginning to be combined, increase speed to medium -high to fully mix in the butter, about 5 minutes.


Dump the dough on a lightly floured work surface and press into a 16 x 10 inch rectangle.  Distribute the blueberries and 2 tablespoons sugar along the top edge and gently roll down toward you into a log.


Place the log on a greased sheet pan, wrap in plastic and refrigerate for at least an hour or up to overnight.


Grease a 9 x 5 inch loaf pan.  Reshape the dough one more time by pressing into a 12 x 6 inch rectangle and cover with the remaining 2 tablespoons of sugar.  With the dough in a vertical position, roll it towards you tightly.  Place in the greased loaf pan, wrap loosely with plastic wrap and allow to rise in a warm place for about 3 hours or until double in size.


Preheat your oven to 350 F.  Brush the dough with some milk and dust with sugar.  (Don't let it pool.)  Bake until golden brown - about 45 minutes.  Allow to cool for about 15 minutes in the pan and then transfer to a cooling rack.


Monday, June 22, 2015

Nutty Millet Cookies


When I first read this recipe for millet cookies, I thought that millet was something that only birds ate and squirrels avoided.  I had no idea that people could eat it, but why not?  It is a whole grain and you can find it both ground and as a seed.  Since reading Whole Grain Mornings (from which I adapted this recipe), I have discovered many grains that I have heard of, but didn't really know how to use or incorporate into my baking/cooking.  Also, if you are looking for something gluten-free, millet is one of those you can use in your baking.  It can also toast it to enhance it's flavor.  I did not however toast them in my recipe, but they add a nice crunch to the cookies.  At any rate, try these out.  They are healthy enough to be eaten for breakfast and filling enough to be eaten as a snack.  The raisins add just enough sweetness to take care of cravings.


Nutty Millet Breakfast Cookies
1 cup whole wheat flour
1/2 cup ground millet flour
3/4 cup rolled oats
1/4 cup whole millet
1/4 cup wheat bran
1/2 teaspoon baking soda
1/2 teaspoon baking powder
1 teaspoon ground cinnamon
1/4 teaspoon ground nutmeg
1/4 teaspoon ground ginger
1/2 teaspoon kosher salt
1/2 cup coconut oil, melted
1/2 maple syrup
1 large egg, beaten
1 teaspoon pure vanilla extract
1/2 cup raisins
1/3 cup pecans, toasted and coarsely chopped

Preheat oven to 350 F.  Line a large baking sheet with parchment paper.  In a large bowl, whisk together the flours, oats, millet, bran, baking soda, baking powder, cinnamon, nutmeg, ginger, and salt.  In another bowl, whisk together the melted coconut oil, maple syrup, egg, and vanilla.  Add to flour mixture, folding in with a wooden spoon until incorporated.  Stir the raisins and pecans into the dough until evenly dispersed.  Make sure all of the wet and dry ingredients are combined.  Let dough rest for 10 minutes.

Scoop out about 1-2 tablespoons of dough and form a ball.  (I use a cookie scoop.) Place the balls about 1 1/2 inches apart on the prepared baking sheets.  Bake until golden brown around the edges and firmed yet still slightly soft in the center, about 10 minutes.  Let the cookies cool for 10 minutes on the baking sheet, then transfer to a wire rack to cool completely.  They should remain fresh for 3-4 days.

Friday, June 19, 2015

Kale Chips

Kale...it seems that it has been on everyone's minds lately.  The nice part is that because it is cheap to grow, it is also cheap to buy.  You can usually get a bunch of it for right around a dollar.  It is everywhere...in the grocery stores, farmers markets and restaurants.  For me, I like to eat it occasionally.  It isn't that I don't like it, but it is usually I don't think about it.  I tend to buy arugula or spinach for my salads...in particular spinach in winter as it can be eaten as a salad or cooked down nicely to add some greens to the meal in winter.  While the same can be done with kale, it just isn't my favorite.  However, with the rise of kale has also some the rise of recipes containing it so we find ourselves actually buying it and eating it more than before it was so popular.  One of my favorite ways to eat a bunch of kale is in the form of kale chips.  They are super easy to make and even easier to eat!  All it takes is a few minutes and a little bit of spices and you have your kale chips ready to eat.

Kale Chips
1 bunch of kale
1- 1 1/2 tablespoons olive oil
1/2 teaspoon onion powder
1/2 teaspoon garlic powder
1/2 teaspoon paprika
salt and pepper to taste


Preheat oven to 350 F. Remove the thick steams of the kale and tear into bite sized pieces.  Put in a salad spinner and wash well.  Pat dry on paper towels or a dish drying cloth. Toss with about 1 tablespoon olive oil (a little more if it is a big bunch).  Sprinkle the dry seasonings over the kale.  Toss everything together to ensure even distribution of olive oil and spices.  Place on a baking sheet lined with parchment paper.  Be sure that no leaves are touching otherwise it will take longer to cook and some will be browned while others are soggy.  Bake for about 10 minutes.  Rotate the baking sheet for even baking.  Bake for another 10 minutes or until lightly browned.  Remove from oven and let cool slightly before eating.