Wednesday, December 31, 2014

Aebleskivers (round Danish pancakes)

I have a serious love of breakfast.  I like savory eggs and bacon, egg in a hole, savory french toast.  But I love a good sweet breakfast too.  Just a slightly sweetened pancake batter with blueberries, pancakes with quinoa, waffles that I can tear apart with my hands to dip into real maple syrup.  The list goes on...so being that it is one of my favorite meals, I have a lot of specialized equipment which I don't use too much for regular cooking.  I have a Belgium liege waffle iron, a regular waffle iron, a juicer so I can have fresh squeezed orange juice with all the delicious things I make.  So this year, with my Scandinavian brunch in mind, I purchased a Danish Aebleskiver pan.  To great thing about these are that they are small and bit sized, but have many variations as you can stuff them with a teaspoon of jam or make them savory with cheese and scallions.  Here is the basic recipe which came from Nordicware's Breakfast cookbook which is sent with the pan.  I haven't have much time to try many variations, but I dream about the different ways they can be made and I long to crave another sweet day to knock out more....I think peanut butter and chocolate chips may be high on the list.
Danish Aebelskivers
Makes 21-35 aebelskivers

3 large eggs, separated
1 1/2 tablespoons vanilla sugar
1/2 teaspoon salt
2 cups flour
1 teaspoon baking powder
1 teaspoon baking soda
2 cups buttermilk

Butter for greasing the pan


Beat egg yolks with sugar and salt.  In another medium bowl whisk the flour, baking powder and baking soda.  Add the dry ingredients to the egg yolk mixture, alternating with the buttermilk.  In a small bowl, beat the egg whites until stiff peaks form.  Fold the egg whites into the batter gently.  Heat the aebleskiver pan over medium heat.  Brush a little butter into each well and add about a tablespoon (or until about 2/3 full).  Cook for about 3-4 minutes.  Turn with a chopstick and cook for another 2-3 minutes.  Remove when browned on both sides.  Place in a dish in a low heat oven to remain warm until serving.  Serve with jam, syrup or your favorite topping.


Krumkake (crumb cake)

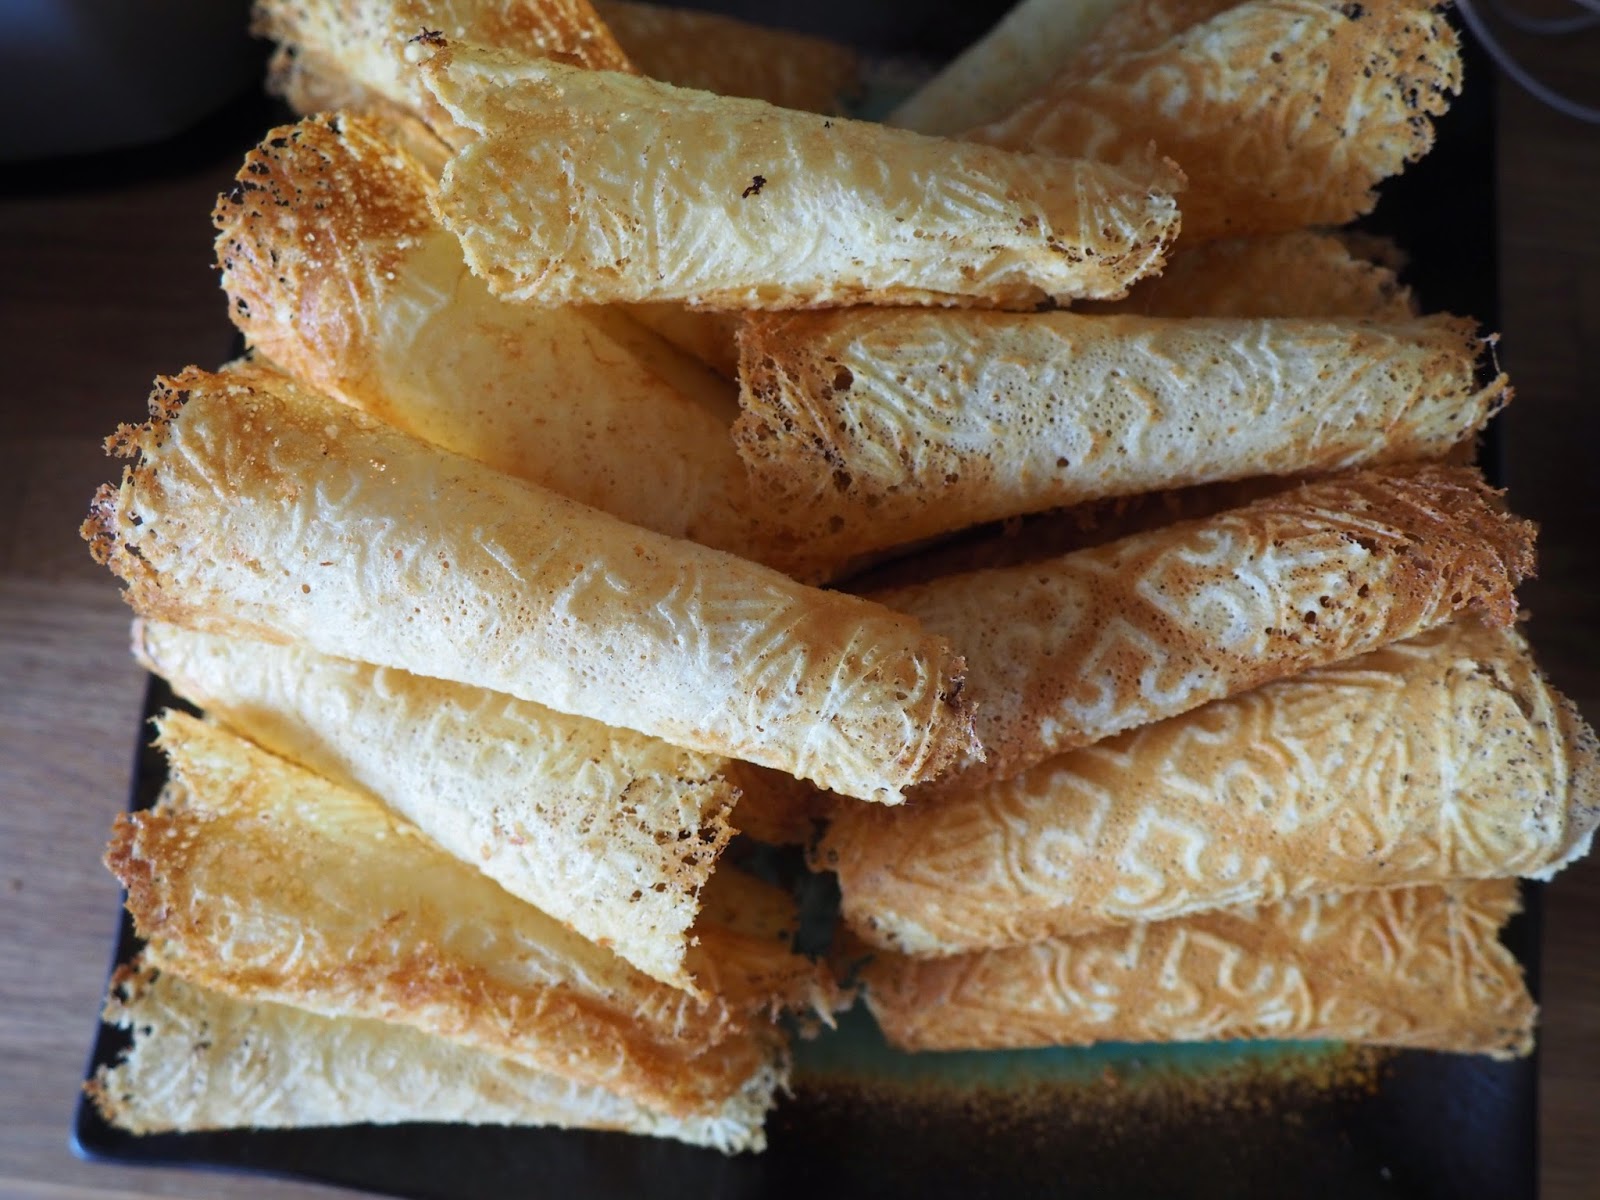
My grandma on my dad's side was 100% Swedish.  It was because of her cooking traditional Swedish goods for Christmas which inspired my Scandinavian brunch this year.  So when having brunch there must be a couple of sweets.  While these are not very filling, nor too sweet, they are a part of my Scandinavian Christmas memories.  Each year my grandma would make tons of these to give to us to share for Christmas.  The good part is that it make a lot!  I think there were 4-5 dozen for this recipe.  They also cook up really quick so in an afternoon you can make a batch which will last a while.  So if you want to add a little Scandinavia to your Christmas, I think this is a delightful way to do it.  The irons have traditional designs on them which add to the atmosphere of Christmas.  Enjoy!

This recipe came from The Great Scandinavian Baking Book by Beatrice Ojakangas, a Minnesotan cookbook author.  While there are not many photos which many people always desire, I have never had a problem following her directions.  Everything I have made has come out beautifully.  If you are going to attempt Scandinavian cooking, I recommend having a look at her books.

Krumkake
1 cup sugar
1/2 cup softened butter
2 eggs
1 cup milk
1 1/2 cups flour
water to thin if needed


In a medium sized bowl, cream sugar and butter.  Beat in the eggs until the mixture is light yellow colored.  Beat in milk and flour until smooth.  Let the mixture stand for at least 30 minutes.  Heat krumkake iron.  (I have an electric one from my grandma so it gets hot quick.)  Spray iron with nonstick cooking spray.  Add about 1 tablespoon batter to each side of the iron and close.  Cook for about 30 seconds.  Roll off of iron with a wooden stick.  (My iron came with two cone shaped wood sticks to make the cone shaped krumkake in the photos.)  If they are too dark cook for 5 seconds less each time.  In a very hot iron, mine cooked for just 20 seconds.


Lamb Stew

The first time I remember eating mutton was when I lived in New Zealand.  Since there is an overwhelming number of sheep there, it is pretty certain that people there would be raising and eating them.  Most of the lamb is exported which leaves the less desirable mutton in New Zealand.  However, like most things, you can figure out a way to make it delicious.  While this recipe uses lamb, you can use any kind of stew meat you would like.  That being said this is a simple recipe with a ton of good tasting vegetables which combined with the meat add all the flavor to this stew without much work on the part of the cook other than cutting everything up.  You can increase or decrease the size of this stew easily as well.  Since this was part of my Scandinavian brunch, the idea is from Scandinavian Christmas.

Lamb Stew (for about 6 servings)
1.5 pounds lamb cut into stew sized pieces (about 1.5 x 1.5 inches)  (You can substitute for any other stew meat)
Olive oil (for searing)
1 leek (you can use a small onion if you don't have a leek), well washed and cut into thick pieces
About a pound of potatoes, peeled and cut into similar sized cuts as the carrots and parnips
2-3 carrots, peeled and cut into chunks
1 large parsnip, peeled and cut into chunks
4 cloves garlic, minced
1-2 red chiles, roughly chopped
1/3 cup diced dried apricots
2 tablespoons tomato paste
salt
black pepper

Heat olive oil in a pan (or into a large stock pot) and sear the lamb until brown on all sides.  Add the vegetables and garlic to the lamb and saute for about 4-5 minutes.  Add the chiles, apricots and tomato paste.  Season with salt and pepper; then pour in 1-2 cups of water.  Cover and simmer for at least an hour.  Taste for seasonings again and adjust as needed.  You can simmer this for several hours, but at least for an hour.  I made mine a day in advance, then cooled and refrigerated it over night.  The next morning I brought simmered it until it was hot throughout and then served.

Sunday, December 21, 2014

Homemade Ricotta Cheese


Ricotta Cheese

Have you ever wondered how to make homemade cheese?  In reading through a couple of cookbooks, I discovered it is very easy to make your own ricotta cheese.  Not only will your cheese be fresher than any you could buy in the store, you can make it for quite a bit cheaper than the store bought ricotta.  You can also control how wet or dry you like it, or how big the curds are for your recipe.  You can also control how much salt is in the cheese.  All you need is milk, cream, lemon juice and patience.

Ricotta Cheese
milk (I use 2 %, but whole milk will produce more curds due to higher fat content)
cream (you can use buttermilk too)
lemon juice
salt (optional)

I usually use a gallon of milk as that way I end up with about 24 ounces of cheese, which is generally enough for two recipes of something...or one recipe of Timballo Pasta with leftovers to snack on with some fresh just picked tomatoes from your garden.

Method:  Pour your gallon of milk and about a cup of heavy whipping cream into a stock pot.  Heat on low heat for about half an hour.  At this point you will want to watch the pot because the curds will separate from the whey at near boiling point.  You want to stir regularly so that the milk doesn't burn or else it will ruin your curds.  Once it reaches about 80C, add about a teaspoon or two of lemon juice.  The acid will help the curds separate.  As you see the curds form you can scoop them out and drain them or you can wait until they are all separated and pour all at once through a fine sieve.  (I do both depending on my mood and impatience.)  Be cautious of the steam so you don't burn yourself.  You can repurpose the whey for something else (or drink it), so don't pour it down the drain.

Once the curds are separated let cool and drain until desired thickness.  Add salt to taste.  Refrigerate until you use, but you should use quickly since there are no preservatives (only the salt you added).

Saturday, December 20, 2014

Chocolate Dipped Marzipan and Nougat (mozartkuegeln)


I saw this recipe in Scandinavian Christmas by Trine Hahnemann.  I knew I had to make it and at least try it the first time with as close to the original recipe as I could before attempting it a second time with modifications.   The basic recipe is really just an assembly of ingredients and then dipped into chocolate.
Every year when I lived in Germany, I would send my mom Mozart balls which are balls of almond paste (marzipan) with hazelnut nougat and usually a whole hazelnut in the middle.  The ones my mom liked best (and so did I) had a pistachio marzipan mixture.  Then the whole thing was dipped into chocolate and individually wrapped.  Fortunately, I can still find them for her in the U.S.  So each year they remain a part of her stocking stuffers.  So instead of just making them and sending them to her without the Mozart balls, this year she gets both.  And next time, I will try making the nougat from scratch since I now know what it is supposed to taste like.  Plus, I know that it will be needed to be rolled out between layers of marzipan, so I know the end goal.
Chocolate Dipped Marzipan and Nougat
about 14 ounces marzipan paste
7 ounces soft nougat, but firm enough to spread
chocolate for dipping (I think I used about 6-8 ounces and used the leftover for Pistachio Almond Cherry Chocolate Bark.)


You can make this in as few or as many layers as you would like.  Due to the softness of the nougat, I decided to make three layer....two with marzipan and one with nougat, but you can do three and two as well.  Roll out each half (7 oz. each) of marzipan into a 4 x 8 (approximately) rectangle.  Smear the nougat on the bottom layer and place the top layer of marzipan on top.  Gently cut into strips and then into smaller squares, rectangles or diamonds.  While cutting, heat the chocolate over water in a double boiler or a bowl which can rest on a small bowl filled with about an inch or two of water.  (Don't let the chocolate get wet from steam or it will seize and you will not be able to use it.)  Once the chocolate is melted dip each marzipan sandwich into the chocolate.  Set aside on waxed paper to set.  (I also refrigerated mine once I complete the tray.)  Once set, you can put into decorative papers and deliver as a present.  My batch made about 4 dozen chocolates.


Friday, December 19, 2014

Kale Bruschetta

This was based on a recipe from Scandinavian Christmas by Trine Hahnemann.   There are many good ideas in this book for Christmas.  It is on my list to make more out of in the near future.

This was another of the appetizer like finger food that I served at the brunch.  It was simple to make and it was delicious.  I wanted some greens because even though it is winter and heavier foods are usually desired, I get cravings for greens.  Kale is a good choice for this appetizer as it holds up well.  Plus, with the oven turned on low it kept these little bites warm until the guests started to arrive.  This would work well with other greens as well.  I think it would be interesting to see it made with rainbow kale to give it a little more color. 


Kale Bruschetta
1 bunch of kale, washed (dried), ribs removed, and chopped
1-2 tablespoons butter
1 leek, washed (as they tend to be sandy), chopped
3 cloves garlic, finely chopped
6 ounces Gruyere finely grated

1 fresh baguette, cut into slices
butter to toast the baguette slices

Toast the baguette in the butter, turning to be sure they are crunchy on both sides.  Melt the butter in a medium sized saucepan.  (I used the same one that was used to toast the bread.)  Add the leek and garlic and saute for a couple of minutes, until softened.  Add the kale and mix together over a low heat until incorporated (you can cook this more or less depending on what you like).  Remove from heat and add the cheese.  Mix together so the cheese is incorporated throughout.  Taste and add seasonings if desired.  (I didn't because the cheese is salty enough for my taste.)  Arrange the baguette on a platter and put a bunch of the kale on top of each.  Serve warm.


Monday, December 15, 2014

Cold Smoked Salmon with Dill on Rye Crisp

I have never really considered myself to be someone who loves fish.  I like to eat it from time to time, but it is not something I am always crazy about because I have had some not so great fish.  I remember being about 9 years old when someone gave me some smoked fish.  I had never had it before, and I can't even remember who gave it to me.  I never had it again until much later on a trip to Norway.  My friend bought some smoked mackerel.  I loved it.  A couple of years ago when I returned to visit the same friend she asked what I wanted to eat while I was there and that was one of the things that I had to have!  On to salmon....I like it baked, broiled, grilled.  Then I discovered cold smoked salmon....my love of smoke mixed with a different fish....and again I was in love.


Yesterday, I hosted a Christmas brunch based on my half Scandinavian part.  Cold smoked salmon was one of the appetizers that I made.  It is simple to assemble and the flavors are outstanding.  Nothing says Scandinavia like dill and salmon.


Cold Smoked Salmon with dill on Rye Crisp
Rye Crisp - I used 9 rounds broken into halves
Neufchatel cheese (6-8 ounces)  (You can use cream cheese if you prefer.)
Fresh dill, finely chopped (reserve some sprigs for the top garnish)
English cucumber, thinly sliced
Cold smoked salmon (about 3.5 ounces)

Put the Neufchatel cheese into a small bowl.  Add the finely chopped dill.  Mix until incorporated throughout.  Place rye crisps onto a plate.  Spread dill and neufchatel cheese mixture onto each crisp.  Place finely sliced cucumber on top of the cheese.  Place a piece of cold smoked salmon on top.  Garnish with a little piece of dill.  Keep chilled until serving.  (Don't leave it too long in the refrigerator or else the cracker will not stay crisp.)  Eat and enjoy.


Saturday, December 6, 2014

Lebkuchen (elisenlebkuchen)

I received this recipe when I lived in Germany.  I fell in love with lebkuchen and although this isn't your traditional baked German treat, it definitely hits the spot baked at home.  Plus, those that have issues with gluten can also indulge in these as there isn't any flour involved.  This recipe also makes a smaller batch than many cookies.  Lebkuchen is traditionally sold during the Christmas season and then those shops which had it are turned into other things (like ice cream shops for the summer season).  There are as many different kinds of lebkuchen as you can possibly think up, so feel free to change things up to satisfy your cravings for other flavors.  If you live close to a German market you can buy oblaten which are little edible discs you can eat and makes the lebkuchen a lot easier to get off the pan.  If you don't have them I would recommend baking on parchment paper or a silicon mat as they can get quite sticky without something under then to release them for eating.


Elisenlebkuchen
3 eggs
1 cup sugar (200g)
1 package vanilla sugar (or 1 tablespoon vanilla sugar or 1 teaspoon vanilla extract)
1-2 pinches of cloves
1 tablespoon cinnamon
1/2 teaspoon rum flavoring
2 -5 drops lemon extract
1/3 cup candy glazed citron (you can use lemon or orange if you can't find citron)
2/3 cup ground almonds
1/4 teaspoon baking powder
2/3 cup ground hazelnuts
8-10 oblaten


Preheat the oven to 375F. Beat the eggs and then add sugar and vanilla sugar (if using).  Mix together until it is light and creamy.  Add the cloves, rum flavoring, and lemon extract and mix.  Then add the candy glazed citron, almonds, and backing powder and mix again.  Then add the hazelnuts, mix and then the dough to settle so it is easy to spread.  Check the consistency and add a little more ground hazelnuts if it spreads too easily.  Put the dough on the oblaten discs and back for 10 minutes.  Let cool and then decorate with chocolate and whole almonds if desired.


Wednesday, November 26, 2014

Finnish Nut Logs (PÄHKINÄLEIVÄ)


Christmas cookie season is upon us!  My family has a lot of traditions as far as the Christmas cookie goes, but this year my focus has been on Scandinavian items.  The raspberry ribbons was the first of them and this Finnish Nut Log is the next in the series of new cookies.  Of course I will probably have to make Lebkuchen (a German cookie) just because it is a favorite of my husband and mine.  So you can look forward to seeing that recipe coming soon!  At any rate, the holiday season is a great time to try new things to add to the tried and true recipes.  Since Thanksgiving is literally tomorrow, this quick recipe can be one made to supplement the plethora of pies that are being made in my home and yours.

This recipe starts from a butter cookie recipe found on the raspberry ribbon page.   After the dough has been refrigerated for at least 30 minutes, then you can continue with the outside piece of this cookie.

Finnish Nut Logs (PÄHKINÄLEIVÄ)
Butter Cookie Dough
1 egg, beaten
1/4 cup finely chopped and toasted almonds
2 tablespoons vanilla sugar

Preheat the oven to 350F.  Place parchment paper on a baking sheet.  Divide the cookie dough into four pieces.  Roll each between your hands to form a rope.  It should be about a half inch across.  Cut into 1 1/2 each pieces.  In a small bowl combine the sugar and the almonds.  Roll the cookie logs into the beaten egg yolk, then dip into the sugar and almond mixture.  Place about 2 inches apart on the baking sheet.  Bake for about 12 minutes or until golden brown.  Remove from oven and cool on a wire rack.  Makes about 4 dozen cookies.

Saturday, November 22, 2014

Vanilla Kiperl (Vanilla Butter Crescents)

I love simple cookies.  I used to like them with chocolate and other flavors, but my favorite kind right now are simple vanilla cookies.  Vanilla kiperl are German cookies, usually made at Christmastime, but are simple to make.  They are sweetened with a bit of vanilla and sugar and then dusted in powdered sugar when they are warm.  The sweetness comes through just right.  This is a mixture from a couple of recipes.  You can also make them with ground almonds instead of hazelnuts.  


Vanilla Butter Crescents
1/2 cup whole hazelnuts, toasted and peeled
1 cup flour
1/4 cup powdered sugar
1 egg yolk
pinch of salt
8 tablespoons unsalted butter
1 1/2 teaspoons vanilla extract

Your hazelnuts should already be toasted.  Place in a food processor with 2 -3 tablespoons of flour to grind to a fine meal.   In another bowl whisk the rest of the flour with 1/4 cup powdered sugar.  Add the flour mixture to the hazelnut mixture and pulse again.  Add the butter and egg yolk and pulse until the dough begins to come together.  Remove and place in a ball and put in the refrigerator for about half an hour.  Preheat over to 325F.  Line the sheets with parchment.  Form the dough into a ball and then roll into crescents.  Bake for about 9 minutes or until just beginning to brown.  Remove and transfer to wire racks to cool.  Dust with additional powdered sugar when warm and again after cooling.

Monday, November 17, 2014

Raspberry Ribbon Danish Cookies

I love baking Christmas cookies, and we are fast approaching the time which will put my weekends into baking mode.  I am also planning on having a Christmas brunch this year.  Because my theme is Scandinavian, I have been testing out some recipe which I will serve for that brunch.  This is one that was on the list.  The benefits are that a lot of cookies can be made at one time and that they are bite sized, so you can't feel guilty about eating one or two....or more.  They also can be made ahead of time while I am preparing more time needed items like freshly baked bread.
So here is my first new cookie experiment for a lightly sweet touch for brunch.  They gave together very quickly and they were easy to incorporate into my other cooking during the cold weekend.  And as an extra bonus, I got to turn my oven on and make the house smell delicious!


Butter Cookie Dough:
1 cup butter, at room temperature
1/2 cup sugar
1 egg
2  2/3 cups flour
1 1/2 teaspoons vanilla extract
1/4 teaspoon salt

Additional ingredients:
Jam (I used a blueberry raspberry mixture.)
1/4 - 1/2 cup powdered sugar
2 tablespoons cream

Cream the butter.  Then add the sugar and mix until well combined.  All the egg and mix again.  Finally, add the flour, extract and salt and mix until it comes together into a ball of dough.  Refrigerate for at least 30 minutes.  Makes about 3 cups cookie dough.


Preheat oven to 375F.  Roll out the butter cookie dough into about an half inch roll.  Place on an un-greased cookie sheet and press down the middle forming a u-shaped log.  Bake for about 10 minutes.  Remove from oven and repress the indentation.  Fill with jam.  Return to the oven and bake for about another 5 minutes or until slightly brown.  Remove from oven and cool.  Once cool enough to touch, mix up the powdered sugar and cream and pipe a line across the cookie.   Cut into 1 inch pieces on the diagonal.


Sunday, November 16, 2014

Denver Omelette with Coucous

I previously mentioned trying to increase my consumption of grains.  I have been experimenting with Whole Grain Mornings by Megan Gordon.  I have made quite a lot of her recipes and have a bunch more tagged to make.  This recipe is based off one from her book.  Since I love omelettes I thought this would be a different and yet similar dish.    I do miss the eggs a little, but this really turned out well with all the flavors, but yet different.  Next time I will probably scramble up an egg and add it to the end result to give me the same, but more filling Denver omelette.  Add more vegetables if you feel you want a more vegetable heavy omelette which is usually what I crave in summer when all the veggies are fresh.


Denver Omelette Coucous
2 tablespoon olive oil
3/4 cup finely chopped onion
3/4 cup finely diced bell pepper (I used a red one)
5 ounces cooked ham, diced into small cubes
2 1/2 cups cooked couscous
1/2 teaspoon salt
freshly ground black pepper to taste
2 tablespoons finely chopped parsley
shredded sharp cheddar cheese (for sprinkling on top, so to taste)
2-3 green onions, chopped

In a saucepan over medium heat, warm the olive oil until shimmering.  Saute the onion and pepper until soft.  Stir in the ham and cooked until thoroughly warm.  Fold in the cooked couscous and reduce the heat to low. Add salt and pepper to taste.  Remove from heat and still in the parsley.  Sprinkle cheddar cheese on top.  It will start to melt.  Scoop the mixture into a bowl and top with green onions.


Saturday, November 15, 2014

Peach Cobbler


My husband loves cobbler.  I have made a bunch of variations, but he loves them all.  This fall I bought a box of Paliside peaches and used this in this recipe.  At the height of sweetness, you can use less sugar since the peaches can hold their own.  The biscuit from this recipe is based off of Whole Grain Morning by Megan Gordon.  We did indeed eat this cobbler for breakfast...and then snacked on it the rest of the day until it was gone.  You can use any combination of fruit to make cobbler.  I want to try it with blueberries and peaches.  It would be great as well with apples.  The possibilities are endless.  Use what is in season for best results, though I think frozen berries would also work well.


Peach Cobbler
Filling:
2 pounds peaches, pitted and sliced
1/4 cup sugar
1 -2 2 tablespoons lemon juice
lemon zest from half a lemon
3 tablespoons flour
1/4 teaspoon salt
Cornmeal Biscuits:
1/4 cup flour
1/2 cup whole wheat flour
1/2 cup corn meal (fine ground)
3 tablespoon sugar
1 1/4 teaspoons baking powder
1/2 teaspoon salt
5 tablespoons cold, unsalted butter
1/2 cup plain unsweetened yogurt
1/2 cup buttermilk

Method: Preheat oven to 375 F.  Lightly butter a 9 inch pie plate.  In a bowl mix together peach slices, sugar, lemon juice, and lemon zest.  Let sit for at least 10 minutes to allow time for sugar to dissolve.  After the sugar has dissolved add the flour and salt to the peaches.  Make the dough by sifting the flours together in a separate bowl.  Add cornmeal, sugar baking powder and salt.  Add the butter and mix into dough until it is pea sized or smaller.  Add the yogurt and buttermilk.  Stir until the dough just comes together.  Pour the peaches into the pie plate.  Drop little pieces of dough until all the dough is gone.  Bake until the biscuit are golden brown and the peach juices are bubbling which should be about 35 minutes.  Remove from oven and cool at least 15 minutes before eating.  You can also wait and serve this at room temperature.

Thursday, November 13, 2014

Shredded Salad with savory cabbage

The first cooking blog that I started reading was 101cookbooks.  I still get the email stating when new posts are there and I love the ideas that Heidi uses to create her recipes.  It was partly due to her website that I decided to start my blog.  This is recipe based on one that was on her blog not long ago.  Since the time change and the cooler days, I have been craving more greens.  I tend not to be very good with eating sufficient greens during the winter, so I always appreciate it when I come across a recipe which I want to make at home.  For some reason in winter, I am more willing for someone else to make it for me.  This salad is quite diverse and you can switch up the ingredient depending on what you have on hand or what you are craving.  I have made it twice already and varied it both times and it still came out excellent.  Give it a try...you'll like it!


Shredded Salad
1 tablespoon olive oil
3/4 teaspoon toasted sesame seed oil
2 tablespoon honey
sea salt
a small bunch of cilantro, chopped
1/2 cup roasted and salted peanuts
1 bunch scallions, thinly sliced
2 1/2 cups shredded savory cabbage (or any kind of cabbage you like)
2/3 cup herbs, chopped (I used basil on time and parsley another time)
2-3 stalks celery, thinly sliced
2 tablespoons light soy sauce
1 tablespoon rice wine vinegar
2-3 tablespoons toasted sesame seeds (though I think pumpkin seeds would be good too)

In a medium bowl, stir together olive oil, sesame oil, 1 tablespoon honey, and a pinch or two of sea salt.  Add the cilantro, peanuts and scallions.  Mix to combine.

In a large bowl stir together shredded cabbage, herbs, and celery.  In a small bowl combine the soy sauce, rice wine vinegar, and 1 tablespoon honey.  Stir to combine.  Pour over the cabbage mixture and stir to coat.  Add half of the cilantro mixture and toss to distribute throughout.  Place the remaining half on top of the salad.  Sprinkle with sesame seeds and serve.


Sunday, November 9, 2014

Swedish Kringle

I love the holiday season.  Starting from November until December 26th, I am like a little kid.  I can't wait for Thanksgiving to cook and eat with friends.  Then I get to decorate for Christmas.  I look forward to every last snow flake that might come...and some are predicted for tomorrow.  Today it is 70F and tomorrow we will have snow!  It is supposed to be 1-2 inches, but this week winter arrives even if it isn't for too long.


Last year I had a small group of friends over to celebrate together before Christmas before everyone went to where they were celebrating Christmas.  This year I decided to grow the table a little and have invited more people.  By heritage I am half Swedish.  My grandma used to cook a Swedish meal for Christmas each year, and so to honor the tradition I am throwing a Scandinavian Christmas brunch.  I have been pouring through my cookbooks and have come up with a tentative menu.  So today I started practicing with Swedish Kringle.  The recipe is close to the one Pat Sinclair has in her cookbook Scandinavian Classic Baking.  I have used this cookbook a bit, but am happy to have an excuse to make more from it.  The recipes are simple and come out beautifully.

Swedish Kringle
Crust:
1 cup flour
1/2 cup cold unsalted butter
1 tablespoon water

 Topping:
1 cup water
1/2 cup unsalted butter
1 cup flour
3 eggs
1 1/2 teaspoon almond extract
 Frosting:
2 cups powdered sugar
1 tablespoon unsalted butter, melted
1 1/2 teaspoons almond extract
2 tablespoon heaving whipping cream (milk if you don't have whipping cream)
 Preheat the oven to 350F.  For the crust place the flour and butter into a food processor and pulse until crumbly.  (It should be pea-sized crumbs.)  Add the water and pulse until it comes together as a dough.  (You may keep it running to see how much water you need.  You may need more or you may need less.)  Divide dough into two balls.  On a lightly floured surface press it into two logs about 10 inches by 3 inches.
 Make the topping by bringing the water and butter to a simmer.  Once all the butter is melted, add the cup of flour and whisk until it comes together into a dough.  Remove from heat and set aside for about 5 minutes before adding the eggs.  Whisk in the eggs one at a time until each is fully incorporated.  Whisk in the almond extract.  Spread over the crust.
 Bake for 50-60 minutes or until lightly golden brown.   Cook on a wire rack or until fully cool.  As it cool the topping will collapse.  When it is completely cool, you can frost them.
 To make the frosting, mix the powdered sugar, butter and almond extract together.  Add 2 tablespoon of heavy whipping cream while mixing. Continue to add cream as needed to bring the frosting to the needed consistency to be able to spread the frosting.
 Cut into 1 inch pieces before eating.  This should make twenty pieces of kringle.


Saturday, November 8, 2014

Homemade basil pesto

Basil Pesto

If you have never tried to make your own pesto, you are missing out.  I highly recommend giving it a try as it is easy to do and doesn't take any time either.  Plus, you can use a variety of different herbs to change up the flavor and it makes a lot more than you can buy in the store.  The first pesto I made was one from Italian Immigrant Cooking by Elodia Rigante.  Once I realized how easy it was to make though, I now put in basically whatever I am feeling that day or what I have on hand.

Basil Pesto
1/2 cup basil (or whatever herb mixture you want to try)
3 tablespoons pine nuts (toasted)
2-4 tablespoons Parmesan or Romano cheese, finely shredded
6 cloves garlic, peeled
3/4 cup olive oil (more if you like it thinner)
1 tablespoon parsley
1/2 teaspoon salt

Combine all the ingredient in a blender until smooth.  Serve over pasta or gnocchi of choice.  Or you can try my ricotta gnocchi.  You can easily double this recipe.


Friday, November 7, 2014

Venison Medallions with Cream Sauce

Venison Medallions with Cream Sauce
We have a couple of friends who are big hunters, which means every now and again we are the recipients of venison.  I have not cooked venison in a really long time, so I searched my extensive recipe collection for something that sounded good which would not result in a too gamey flavor in the venison.  These medallions turned out great and the idea was based off a recipe in Black Forest Cuisine by Walter Staib.  Ironically, this cookbook came from a used bookstore.  Ironic because I have German cookbooks in German from when I lived there, but I was excited about this cookbook because it brought me some new recipes but others that just reminded me of my time in Germany.

These medallions are served over garlic mashed potatoes.  My husband is the mashed potato maker in our family.  He tried his hand at it a number of years ago and had success which led to the lead mashed potato maker.  Between the venison medallions and mashed potatoes this is definitely a heavier meal, which I offset with my roasted brussel spouts.

Venison Medallions in Cream Sauce
1 pound venison medallions of even thickness
1 1/2 cups burgundy wine
1 sprig fresh rosemary
1/8 teaspoon dried sage 
2 cloves garlic, peeled and finely chopped
2 shallots, peeled and finely chopped
1 teaspoon unsalted butter
1 leek, trimmed and sliced into strips (1.5 inched by 1/4 inch wide)
1 cup sliced mushrooms (about 5-6 mushrooms depending on size)
2 cups beef stock
2 tablespoons sour cream
salt and pepper to taste

Marinate venison in burgundy, rosemary, sage, garlic and 1 chopped shallot.  Turn throughout the day to ensure all has been marinated.

When you are ready to cook, discard the marinade.  Melt the butter in a pan over medium high heat.  Cook the venison medallions until browned, about 3 minutes per side.  Remove the venison and cover while continuing to cook.  Turn heat to medium and add the other shallot and saute for about a minute until softened.  Stir in the leeks and mushrooms and saute for 2-3 more minutes.  Add a little of the beef stock to work up the bits of browned pieces.  Turn to medium low and add the rest of the beef stock.  Simmer for about 2 more minutes.  Remove from heat and let cool just a bit.  Add in the sour cream and season to taste with salt and pepper.

Serve over mashed potatoes.  Places the medallions on the mashed potatoes and pour the cream sauce over the top.

Sunday, November 2, 2014

Chocolate Kranz

I stumbled upon this recipe for Chocolate Kranz in Ottolenghi and Tamimi's Jerusalem cookbook.  I had just received it for Christmas and was devouring the reipes.  Normally, I don't pay a lot of attention to the sweets in cookbooks, but I thought this recipe would be ideal since a lot of people in my family and my husband's family like the Chocolate Babka that I had made in a prior year.  Chocolate Kranz is not a difficult recipe, but it does take time.  Chocolate Babka is not a huge undertaking either, but I really dislike hand chopping loads of chocolate.  My mom-in-law has told me that it works to do this in a small chopper, but when I have tried it, the chocolate just melts....so I wanted to try my hand at the Kranz.  I also am a big fan of nuts with chocolate, so I wanted to try it for this reason as well.

I have to say that though it took some time, it was well worth it.  The results were delicious and worth the effort and planning to make.  My husband also liked these loaves and better than the babka because it wasn't quite as sweet as the babka.
Chocolate Krantz Cakes
Dough:
4 1/2 cups flour
1/2 cup sugar
2 teaspoons fast rising active dry yeast
lemon zest from 1 lemon
3 large eggs
1/2 cup water
1/4 teaspoon salt
2/3 cup unsalted butter, cut into 3/4 inch cubes
oil for greasing
Chocolate nut filling:                                                   Syrup:
1/2 powdered sugar                                                   2/3 cup water
1/3 cup cocoa powder                                               1 1/2 cups sugar
5 ounces dark chocolate, melted
1/2 cup unsalted butter
1 cup chopped pecans
2 tablespoons vanilla sugar


Place the flour, sugar, yeast, and lemon zest in a stand mixer fitted with a dough hook on low speed for a minute.  Add the eggs and water and mix on low speed for a couple of seconds.  Then turn it up to medium and mix for a couple of minutes until the dough comes together.  Add the salt and start adding the butter little at a time until it is incorporated into the dough.  Mix for an additional 10 minutes until the dough is smooth and elastic.  If needed scrape down the sides and add additional flour.  Place the dough in a bowl greased with oil.  Leave in the refrigerator overnight.


Grease two loaf pans with oil (a mild one preferably) and line with waxed paper.  Divide the dough in half (leaving the second half in the refrigerator while you work with the first half).  Meanwhile make the filling by combing the powdered sugar, cocoa powder, chocolate and butter.  Roll out the dough to 11x15 inches.  Use a spatula to spread half of the chocolate paste over the dough with about a 2/3 inch border.  Sprinkle half the pecans and then the sugar on top of the dough.  Roll up the rectangle (start with the long side closest to you and roll it up).  Seal the end with a bit of water and press to seal.  Rest on the seam.  Trim the edge.  Then take a knife and cut the roll in half lengthwise.  Leave the cut side up and lift one log over the other until you have a braid with the two logs.  Squeeze the ends together and gently lift into a pan.  Cover the pan with a damp cloth and let rise in a warm place for about an hour.  The dough will rise about 10-20 percent.  Repeat with the second half of the dough.


Preheat the oven to 375F.  Remove the cloth and bake for about 30 minutes.  A skewer inserted in the bread should come out clean.  When the bread is baking, make the syrup.  Dissolve the sugar in the water over medium heat.  Bring to a boil.  As soon as the bread comes out of the oven brush with the syrup, using all the syrup.  Leave the bread until they are warm and then remove from the pans.  Let cool before serving.

Makes two loaves